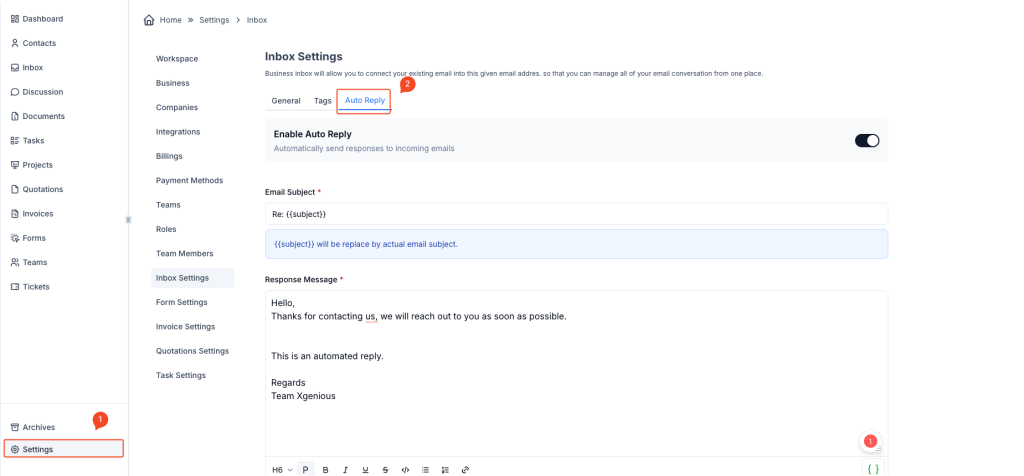
Auto-replies are a convenient way to ensure that your customers receive immediate acknowledgment of their inquiries. This guide walks you through setting up an auto reply in your business inbox.

Steps to Enable Auto-Reply: #
- Navigate to Inbox Settings:
- Go to the sidebar menu and click on Settings.
- Under Settings, select Inbox Settings.
- Access the Auto-Reply Tab:
- Within the Inbox Settings page, click on the Auto Reply tab at the top.
- Enable Auto-Reply:
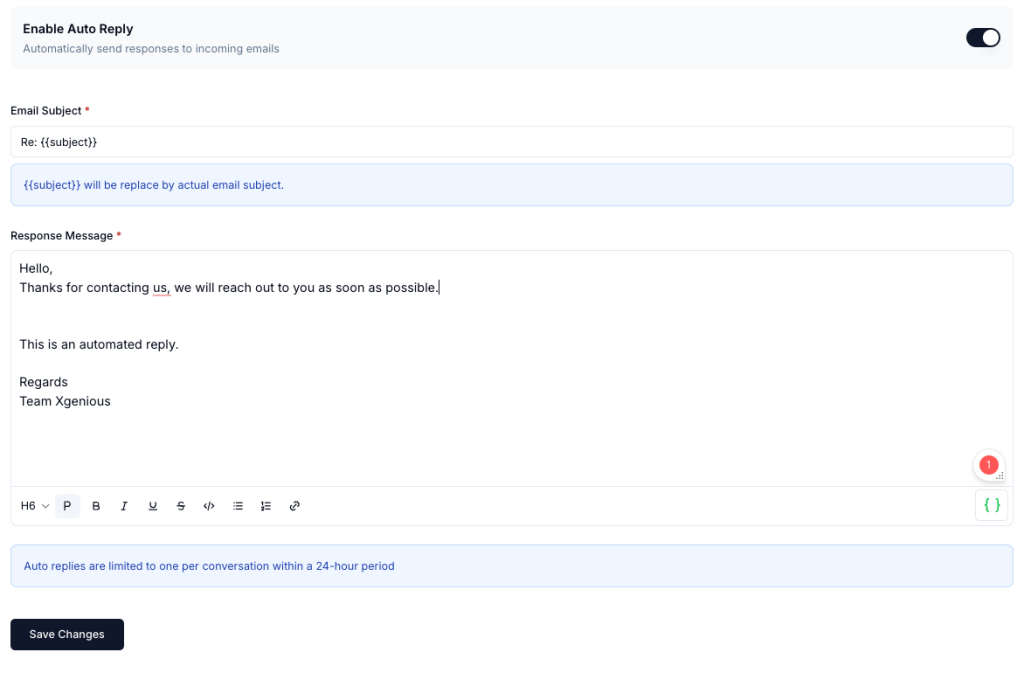
- Toggle the Enable Auto Reply switch to activate auto-replies.
- Configure Email Subject:
- In the Email Subject field, specify the subject line for your auto-reply.Use placeholders like
{{subject}}to dynamically include the subject of the incoming email.
- In the Email Subject field, specify the subject line for your auto-reply.Use placeholders like

Example: #
Re: {{subject}}
{{subject}} will be replaced with the actual subject of the incoming email.
5. Write the Response Message:
In the Response Message field, compose the message that will be sent automatically in response to incoming emails.
Hello,

Thanks for contacting us. We will reach out to you as soon as possible.

This is an automated reply.

Regards,
Team Xgenious
6. Save Changes:
After filling in the required fields, click on the Save Changes button at the bottom of the page.
Important Notes: #
- Auto-replies are limited to one per conversation within a 24-hour period.
- The
{{subject}}placeholder ensures personalized responses by reflecting the subject of the original email.


