Creating a project in Taskip helps you organize work, assign tasks, track progress, and collaborate with your team efficiently. By setting up a project correctly, you ensure all team members and clients stay informed and deadlines are met.
How Does It Work?
Projects in Taskip are containers for tasks, stages, and files. Each project can have: #
- Assigned team members and a project manager
- Status, priority, and start/end dates
- Tags for easy organization
- Visibility settings (Public or Private)
Once created, you can track progress, add tasks and stages, upload files, and communicate with your team all in one place.
Navigation #
- Log in to your Taskip account.
- From the Main Menu, select Projects.
How to Create a Project? #
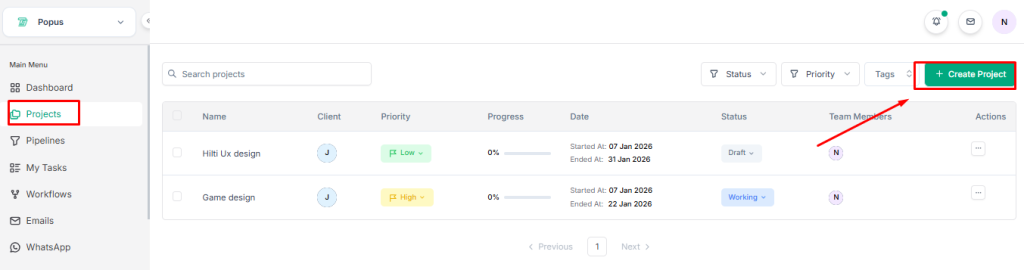
- Go to the Projects tab.
2. Click + Create Project.
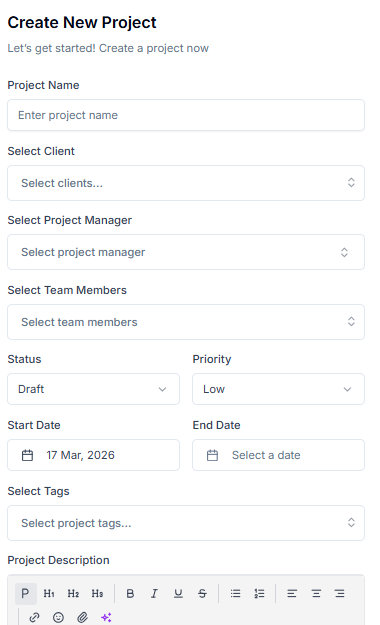
3. Fill in the following information in the Create New Project form:
Project Details:
- Project Name – Enter the name of your project.
- Select Client – Choose the client for this project.
- Select Project Manager – Assign a project manager.
- Select Team Members – Assign team members to the project.
- Status – Choose the current status: Draft, Working, Review, Completed.
- Priority – Select priority: Low, Medium, High, Urgent.
- Start Date – Choose the project start date.
- End Date – Set the project end date.
- Select Tags – Add tags to categorize your project.
- Project Description – Add relevant details about the project.
Project Visibility:
- Public – Everyone in your workspace can find and access this project.
- Private – Only invited members can access this project.
Notifications:
- Optionally, notify the client when the project is created.
- Once all fields are filled, click Create Project to save.
Your project is now ready, and team members can start collaborating immediately.


