To add a new stage in the sales pipeline, follow these steps:
1. Navigate to Your Pipeline #
- Open the Sales Pipeline view in your CRM.
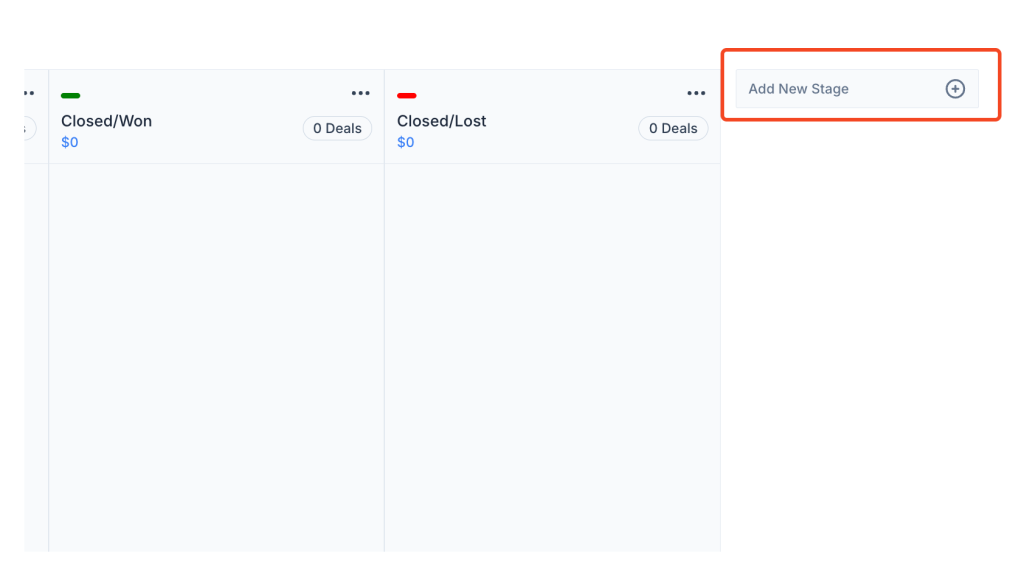
2. Click on “Add New Stage” #
- On the right side of the pipeline, you will see an option labeled “Add New Stage” (usually located at the end of the current stages).
- Click on the Add New Stage button.
3. Enter Stage Name #
- A prompt will appear asking you to enter the stage name. Choose a descriptive name for the new stage that fits your sales process.
4. Customize the Stage (Optional) #
- Some systems may allow you to customize additional settings for the stage, such as color, probability of closing, or other properties that define how this stage functions within your pipeline.
5. Save the Stage #
- After naming and customizing the stage, click Save or Add Stage (depending on your system) to add the new stage to your pipeline.
Insight: #
Adding a new stage is crucial for adapting your pipeline to changing business needs. Each stage represents a specific part of the sales process, so adding new stages allows for greater flexibility and better tracking of deals as they move through the pipeline.


