Custom fields allow you to collect and manage additional contact information tailored to your business needs. Follow these steps to add custom fields in Taskip.
Step 1: Navigate to Contact Settings #
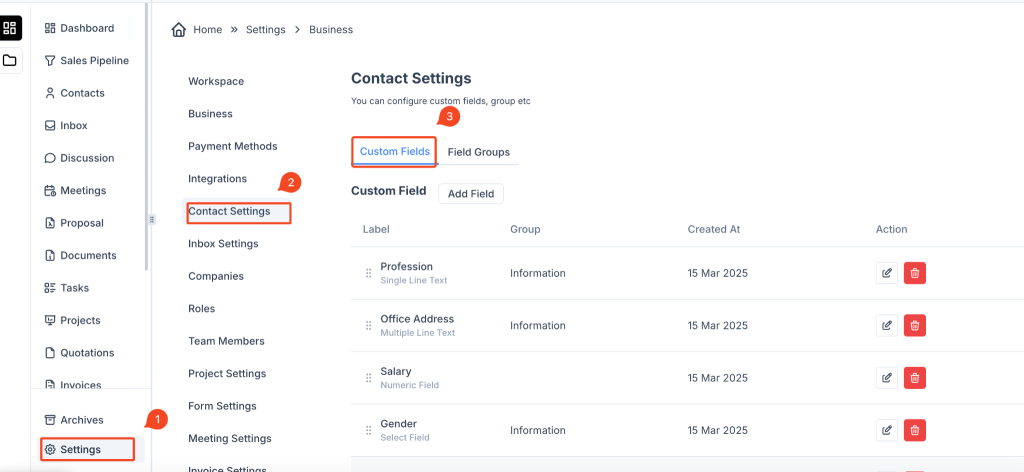
- Open Taskip Dashboard.
- Click on Settings from the left sidebar.
- Select Contact Settings under the Business section.

Step 2: Open Custom Fields #
- Inside Contact Settings, click on the Custom Fields tab.
- Click on the “Add Field” button to create a new custom field.

Step 3: Configure the Custom Field #
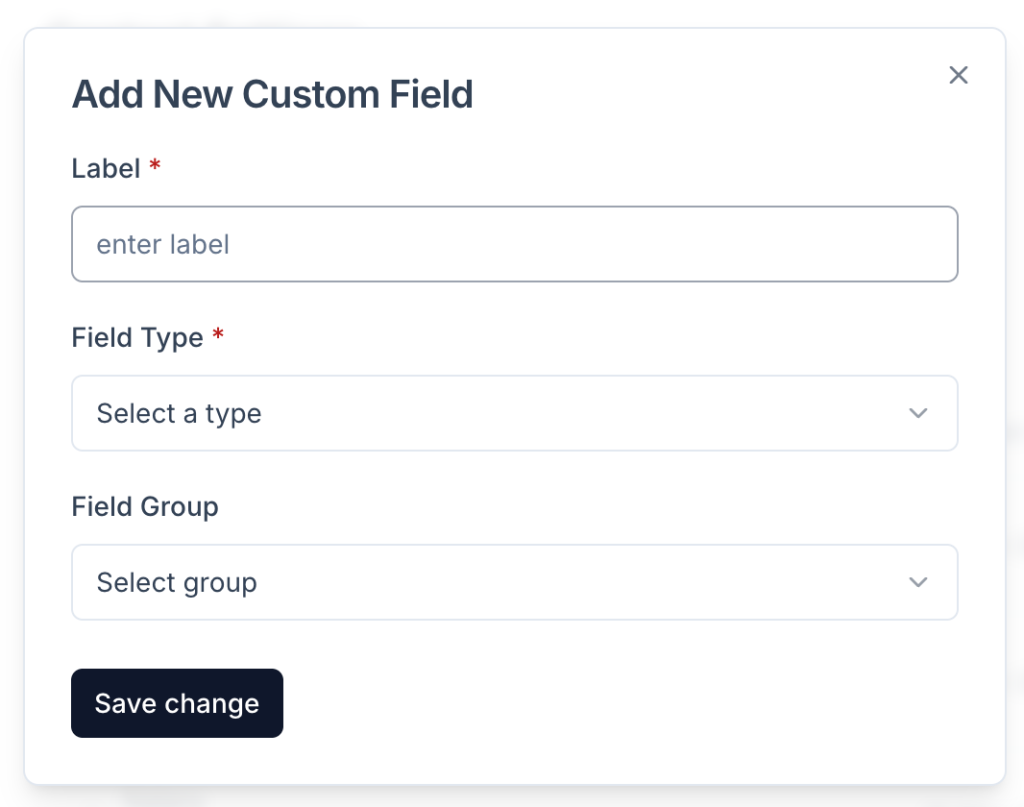
- Enter Label – Provide a name for the custom field (e.g., “Job Title”, “Company Size”).
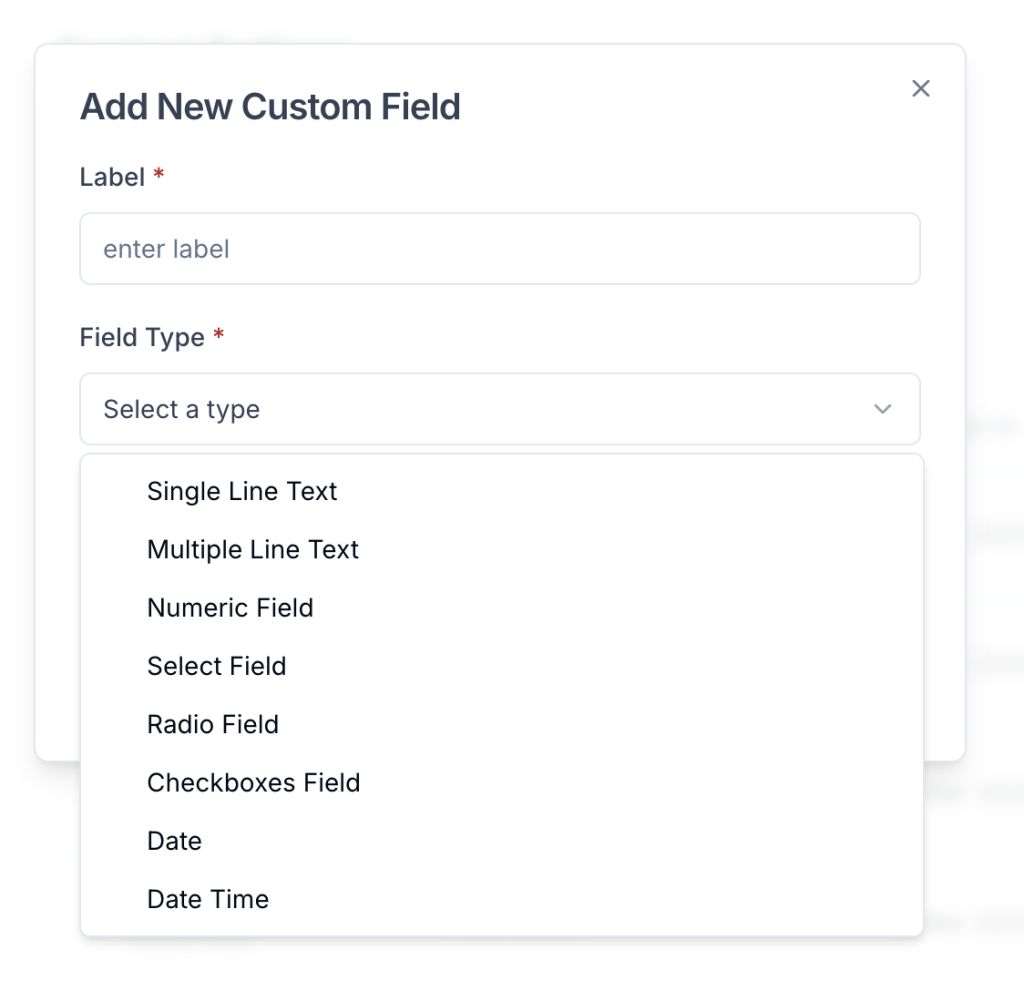
- Select Field Type – Choose from various field types:
- Single Line Text – For short text input.
- Multiple Line Text – For long descriptions.
- Numeric Field – For numbers (e.g., salary, phone number).
- Select Field – Dropdown selection.
- Radio Field – Single-option selection.
- Checkboxes Field – Multiple-option selection.
- Date – For date input.
- Date Time – Includes date and time input.
- Select Field Group – Assign the field to a category (e.g., “Information”, “Preferences”). You can add your own group from the group tab.

Step 4: Save and Apply #
- Click “Save Changes” to add the field.
- The new field will now be available when creating or editing a contact.
Custom Fields Are Now Added! #
Your contacts can now include custom data fields for better organization and personalization also you can group them by segment.


