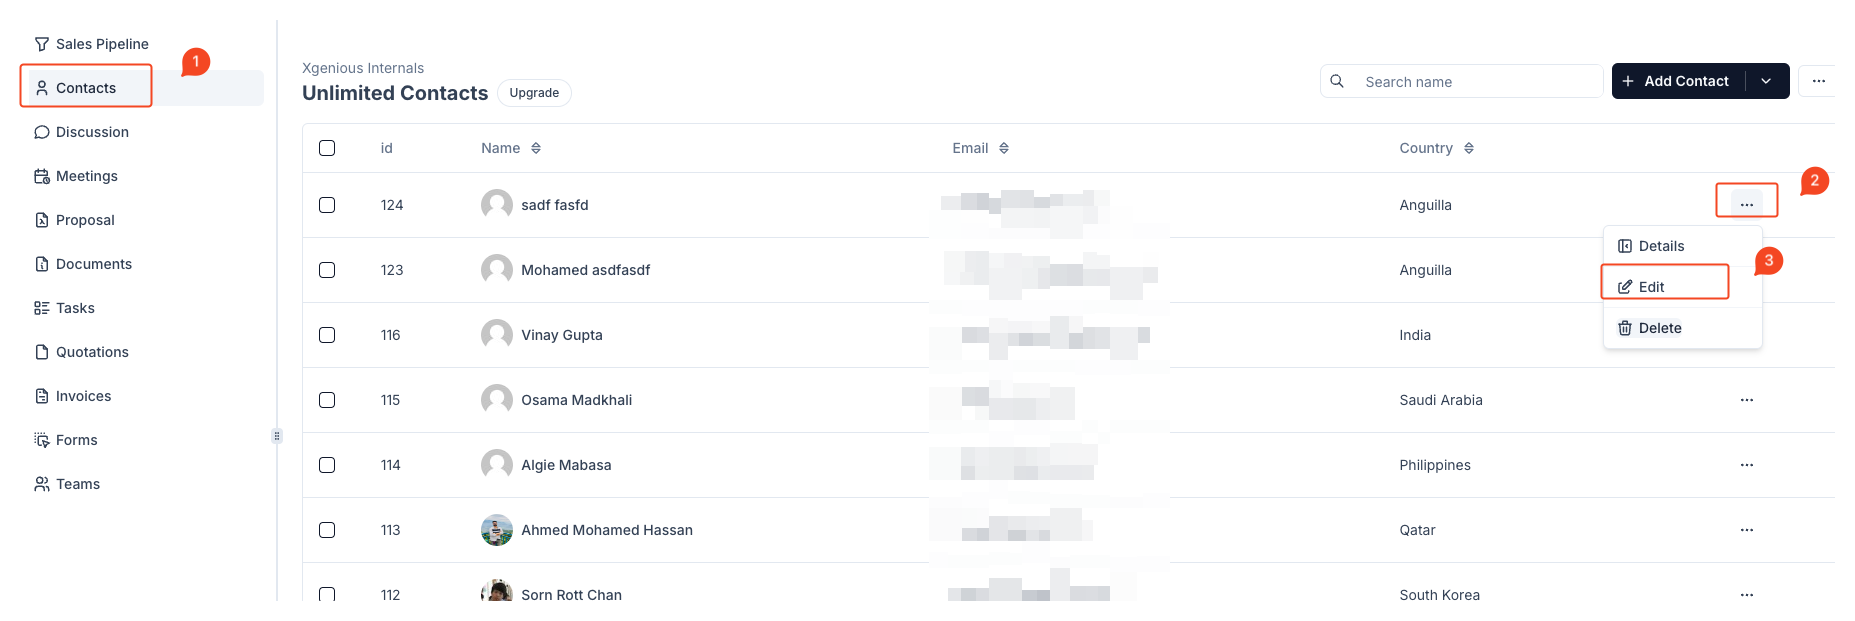
To provide a client access to the client portal, follow these steps:
- Navigate to the Contacts Section
- From the left sidebar, click on Contacts.
- In the contact list, locate the contact for whom you wish to enable portal access.
- Click on the three dots (⋮) next to the contact and select Edit.
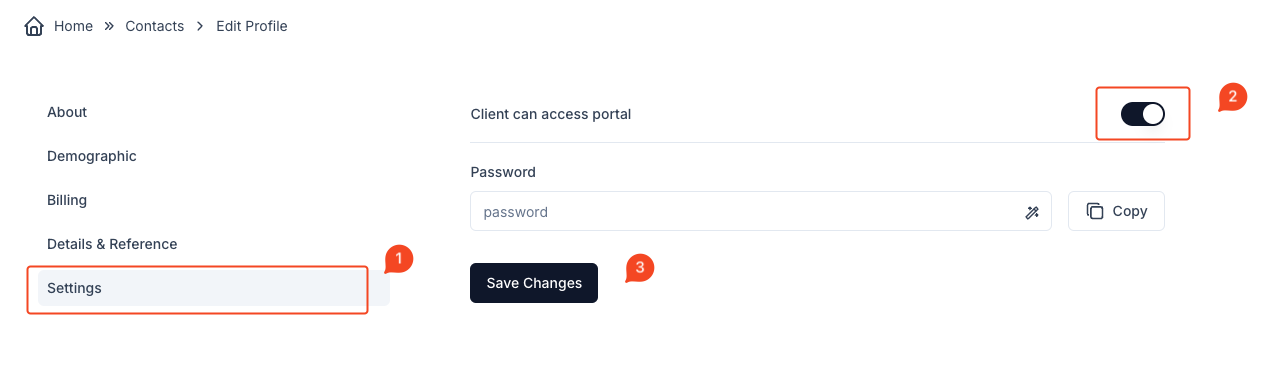
- Access the Settings Section
- On the contact’s Edit Profile page, find and click the Settings tab from the left-side menu.
- Enable Portal Access
- Toggle the switch label as client can access portal to the ON position.
- Once enabled, you will be able to set a password for the client.
- You can either generate a new password or copy an existing one by clicking Copy.
- Save Changes
- After enabling portal access and configuring the password, click the Save Changes button to apply the settings.
The client will now be able to log in to the client portal using the assigned credentials. Make sure to communicate the login details to the client securely.


