Customize the fields and settings in your meeting booking form to match your scheduling requirements.
Steps to Modify a Meeting Booking Form: #
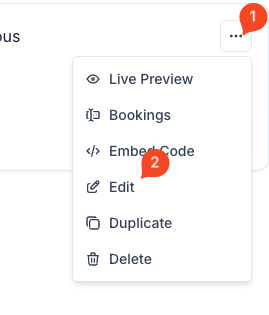
- Navigate to Meetings:
- From the sidebar, click on ‘Meetings’.
- Select a Meeting:
- Choose a meeting card from the list.
- Click on the ‘… (Options)’ menu located on the top-right corner of the card.

- Edit Meeting Details:
- Select ‘Edit’ from the dropdown menu.
- Access the Forms Tab:
- In the meeting settings, navigate to the ‘Forms’ tab.
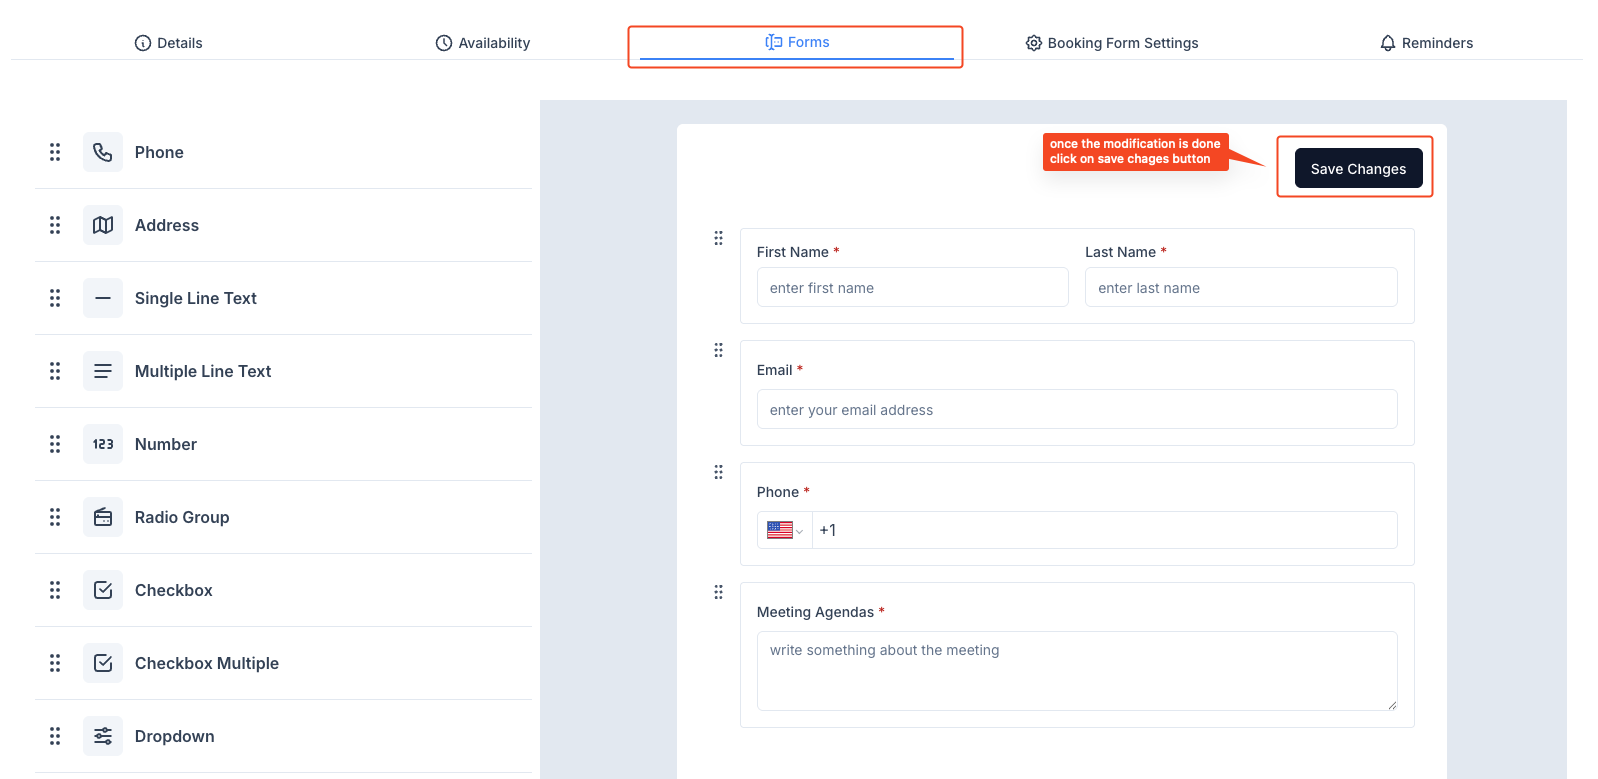
- Add or Modify Form Fields:
- Use the available options to add or edit form fields:
- Single Line Text
- Multiple Line Text
- Number
- Radio Group
- Checkbox
- Dropdown
- Use the available options to add or edit form fields:
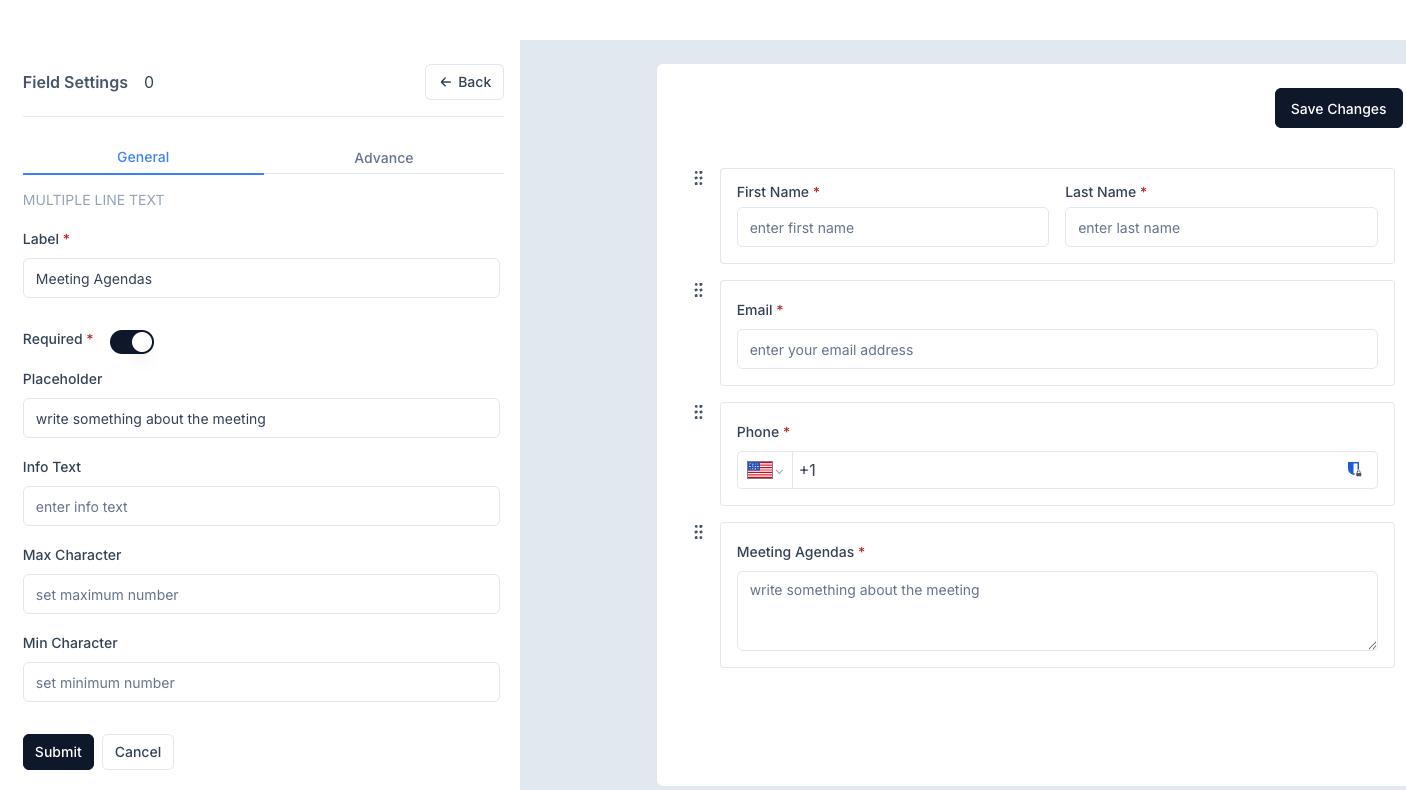
- Field Settings:
- Click on any field to open the Field Settings panel.
- Adjust the following settings:
- Label: Update the field name.
- Required Toggle: Enable/disable mandatory status.
- Placeholder: Add placeholder text.
- Info Text: Provide guidance for users.
- Max/Min Character: Define text length limits.
- Save Changes:
- After making the necessary adjustments, click on the ‘Save Changes’ button at the top-right corner.
Best Practices: #
- Ensure all required fields are marked appropriately.
- Use placeholders and info text for clarity.
- Preview the form before finalizing changes.
That’s it! Your meeting booking form is now updated and ready to use.


