Creating invoices in Taskip is simple and can be done directly from your dashboard. You can generate professional invoices quickly, complete with e-signature options and customizable templates to match your brand.
Invoice Creation #
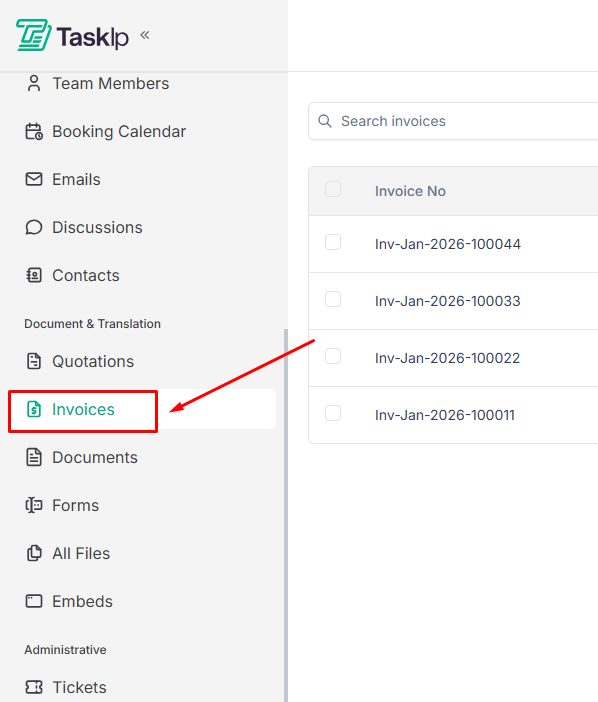
Step 1: Open Invoices
- Log in to your Taskip account.
- Scroll down the left-side menu and click Invoices.
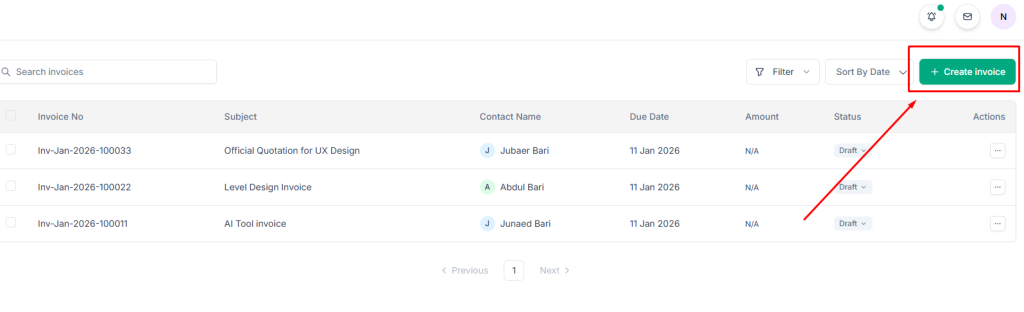
Step 2: Create a New Invoice
- If you haven’t created any invoices yet, a Create Invoice button will appear in the center of the screen.
- If invoices already exist, click Create Invoice from the top-right corner.
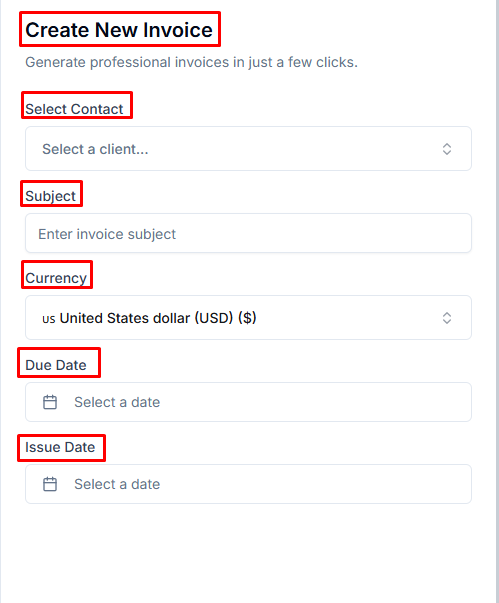
Step 3: Fill in Basic Details
Complete the invoice form with the following information:
- Select Client
- Subject
- Currency
- Due Date
- Issue date
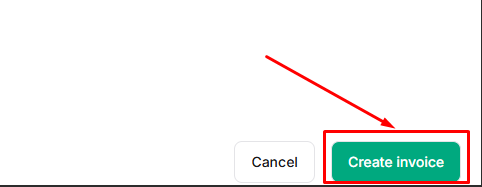
Step 4: Create the Invoice
Click the Create Invoice button at the bottom of the form. Your invoice will be created instantly.
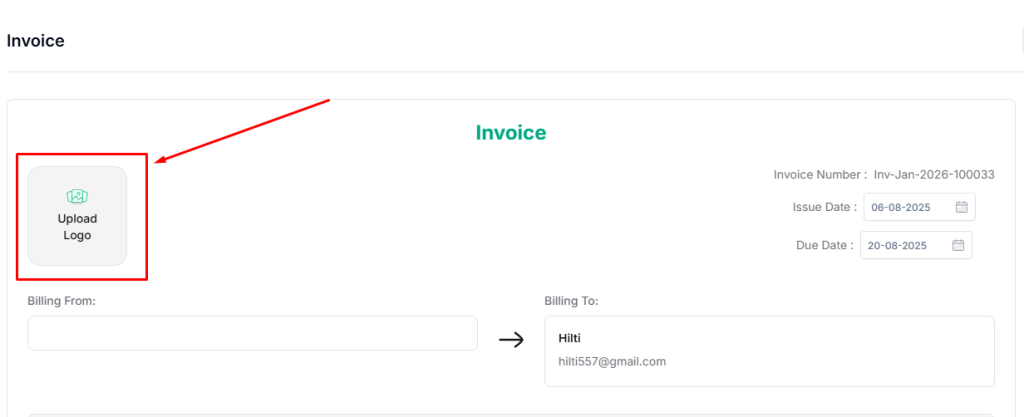
Step 5: Upload Your Logo
Click Upload Logo to add your brand logo to the invoice.
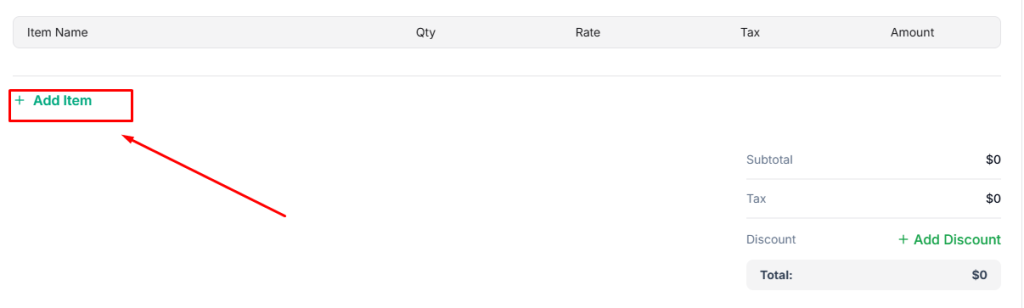
Step 6: Add Items
Click Add Item to include services or products in your invoice.
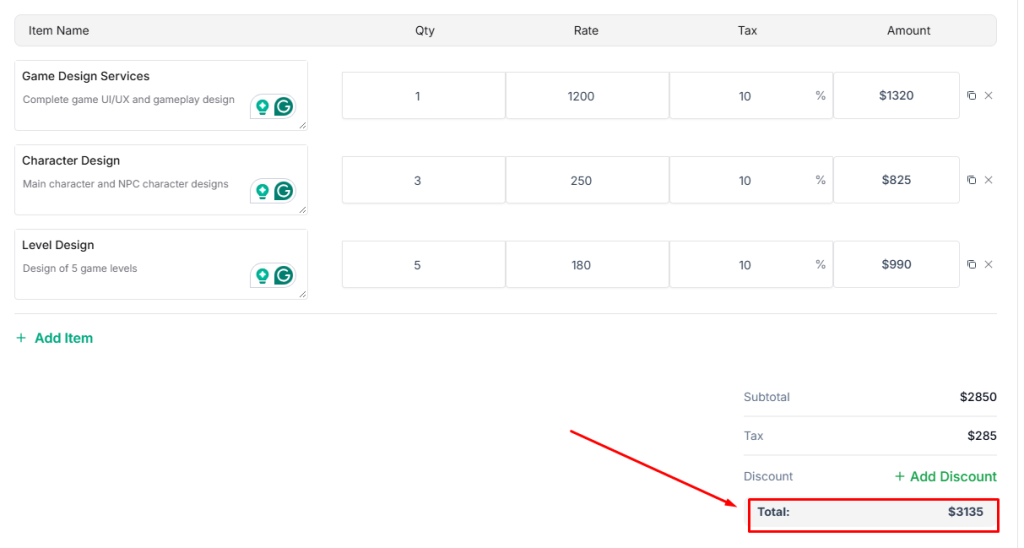
Step 7: Enter Item Details
Provide the following details for each item:
- Item Name
- Description
- Quantity (Qty)
- Rate
- Tax

Once entered, the Amount will be calculated automatically.
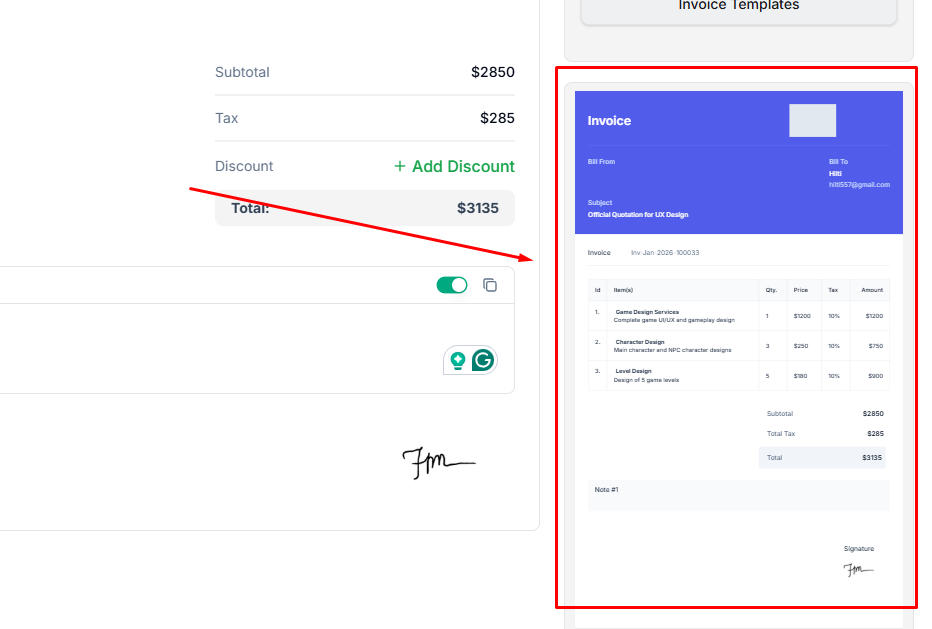
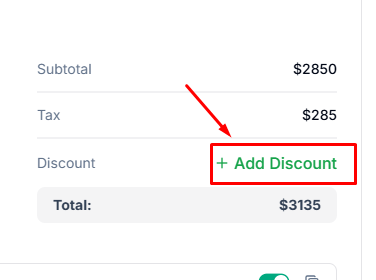
Step 8: Review Total & Add Discount
- After adding all items, the Total Amount will be generated automatically.
- To apply a discount, click Add Discount and enter a fixed amount or percentage.
Step 9: Add a Note (Optional)
Enable Note to add payment instructions or additional terms. A notes section will appear in the invoice.
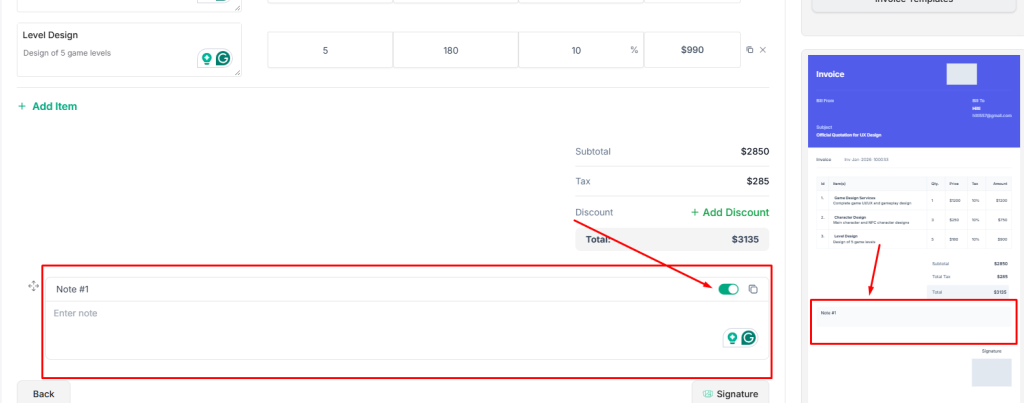
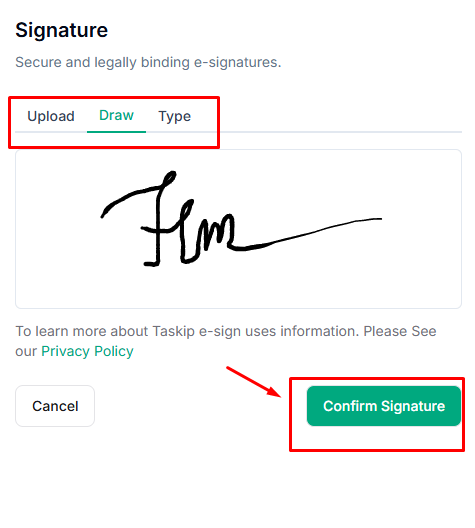
Step 10: Add Signature
- Click Signature to add an e-signature.
- Upload, draw, or type your signature.
- Click Confirm Signature to apply it to the invoice.
Invoice Template & Payment Settings #
On the left side of the invoice interface, you’ll find customization options to match your brand.
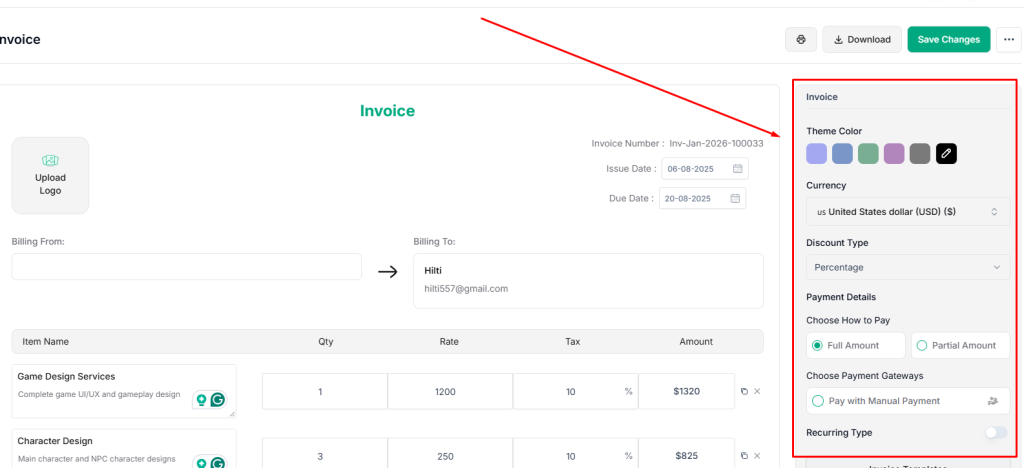
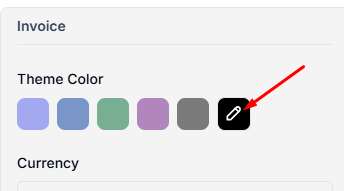
Step 1: Customize Theme Color
Click the Edit icon under Theme Color and choose a color that matches your brand.
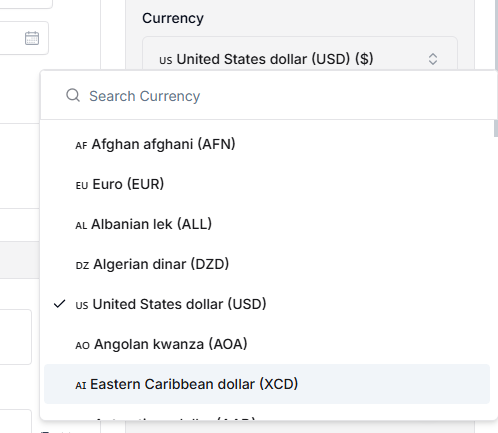
Step 2: Select Currency
Choose your preferred Currency from the dropdown.
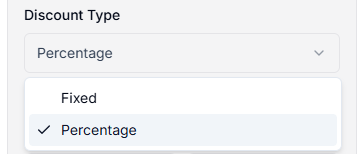
Step 3: Choose Discount Type
Select a Discount Type from the dropdown:
- Fixed
- Percentage
Step 4: Set Payment Details
- Choose how to pay: Full Amount or Partial Amount
- Select the payment gateway
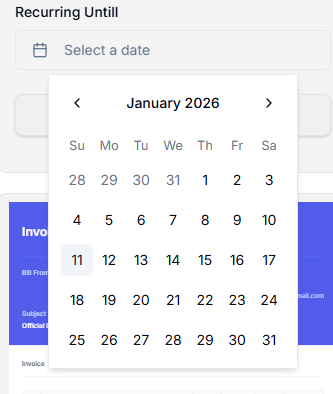
- If it’s a recurring payment, enable the Recurring Type

- Select Recurring Type from the drop-down menu:
- Weekly
- Monthly
- Yearly
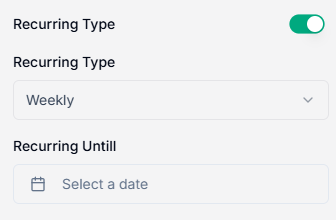
- Choose a date for the recurring period
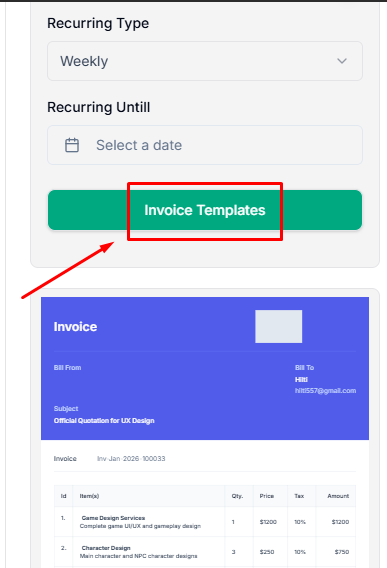
Step 5: Choose an Invoice Template
Click Invoice Templates and select a template that suits your needs.
Step 5: Save & Download
- Click Save Changes.
- Use the Download or Print icon to export your invoice.
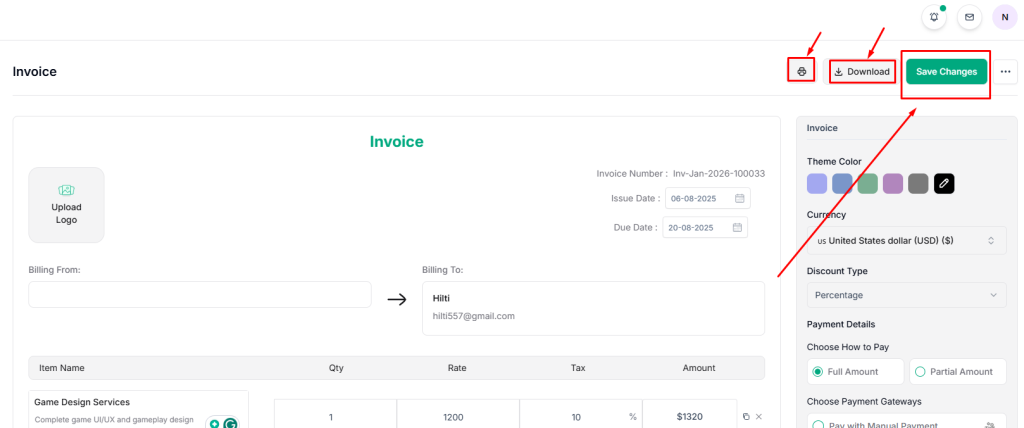
Step 6: Your invoice is now ready to be shared with your client.