Email forwarding in Namecheap allows you to direct emails sent to one address at your domain to another email address. This is useful if you want to use a branded email address for your business but receive emails in a different account (like a Gmail or business inbox). Follow these steps to set up email forwarding in your Namecheap account.
Step-by-Step Instructions #
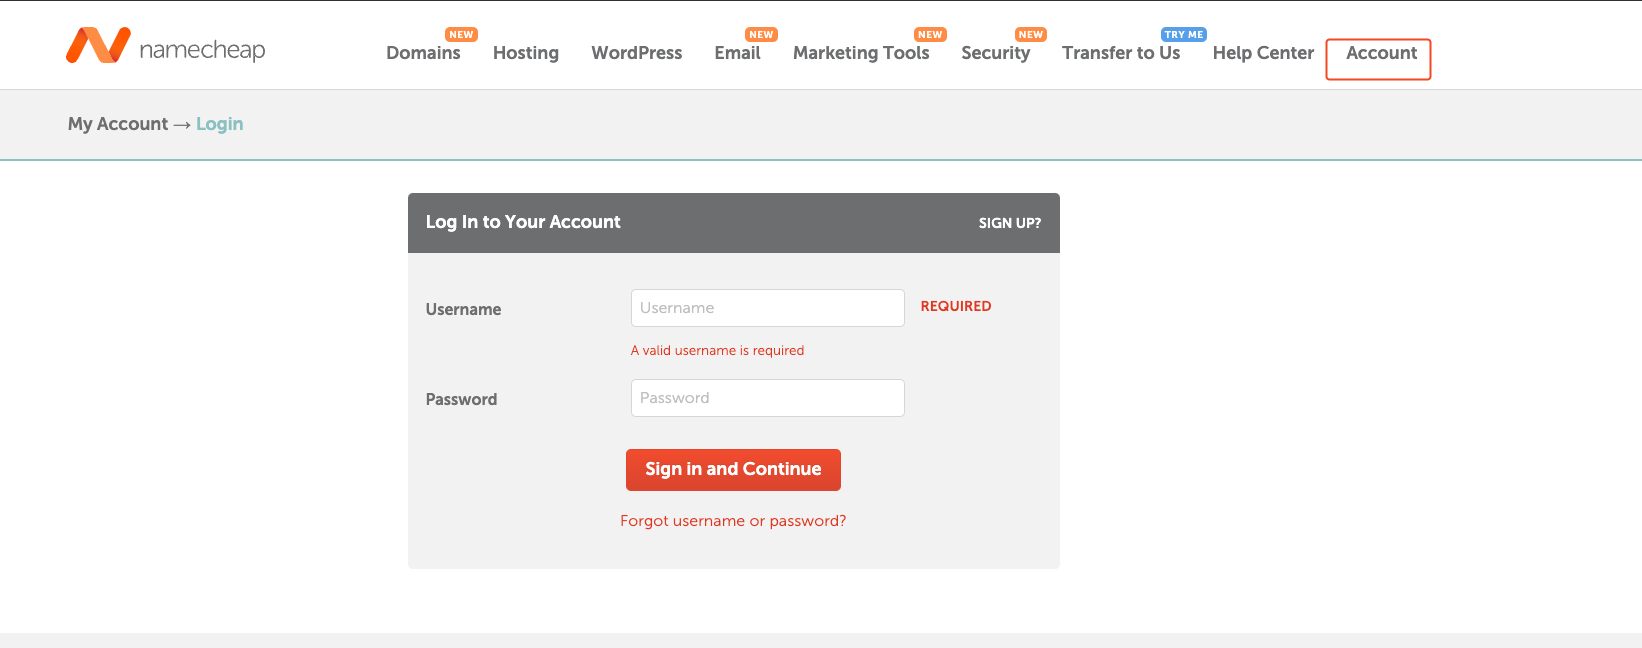
- Log In to Namecheap:
- Go to the Namecheap website and click on Account in the top menu.
- Enter your Username and Password, then click Sign in and Continue to access your account.
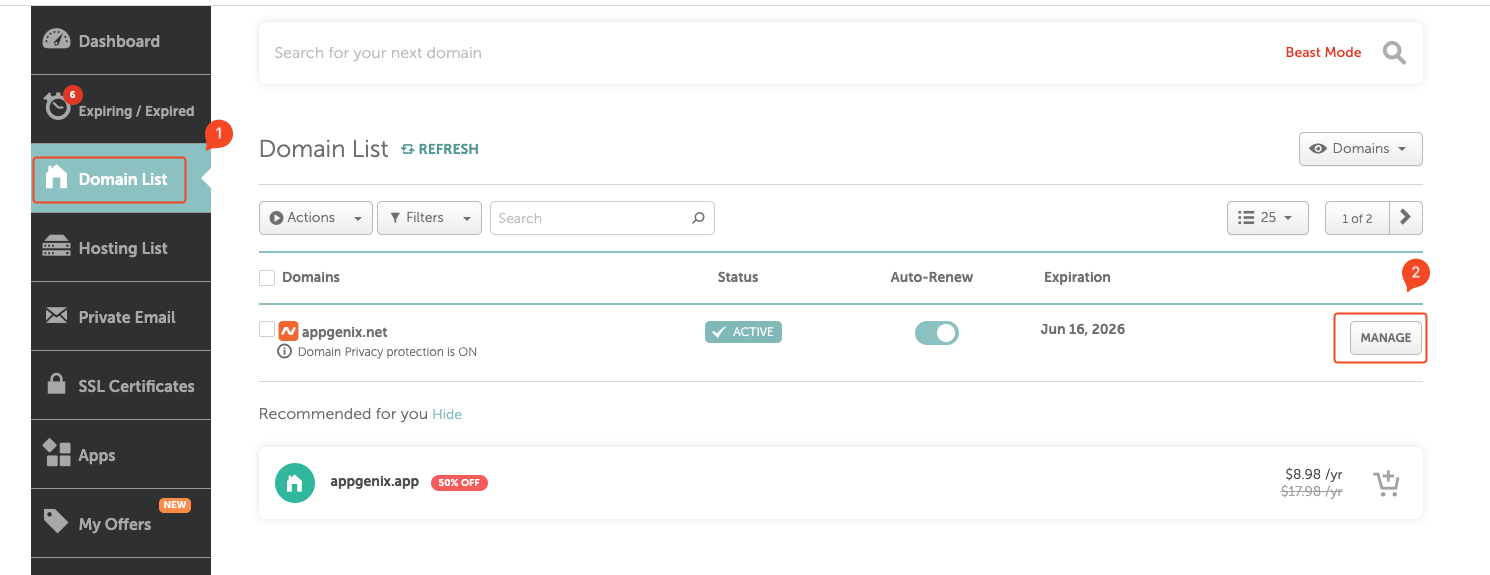
- Access Domain List:
- After logging in, go to the Domain List from the left-hand sidebar in your dashboard.
- Select Domain to Manage:
- Locate the domain for which you want to set up email forwarding.
- Click the Manage button next to the domain name.
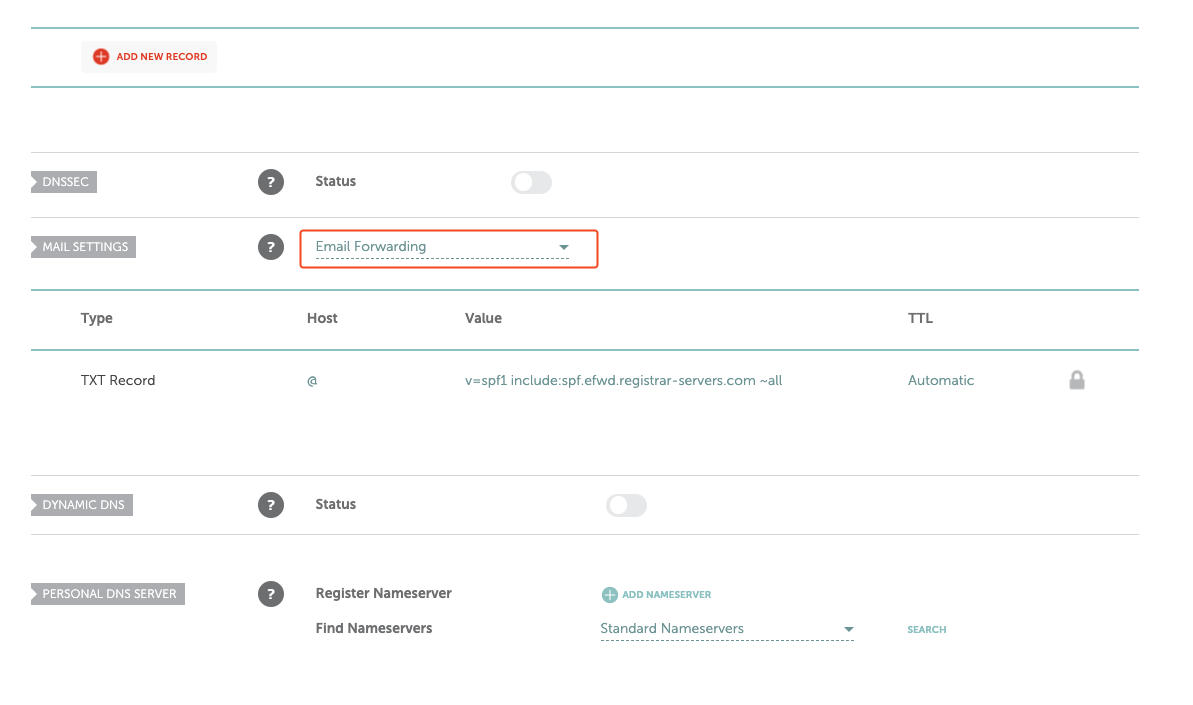
- Find the Email Forwarding Setting:
- In the domain management area, scroll down to the Mail Settings section.
- Click on the Mail Settings dropdown menu and select Email Forwarding.
- Add Forwarding Addresses:
- After enabling email forwarding, you may need to add specific forwarding addresses (if available in this section).
- Set the forwarding rules by entering the alias (e.g.,
[email protected]) in the forwarding list and the taskip workspace email where messages should be sent (e.g.,[email protected]).

- Save Changes:
- Make sure to save any changes you made in the forwarding settings.
- It may take a few minutes for the email forwarding to start working.


