Workflow Automation in Taskip allows you to automatically take action when something specific happens, like receiving a new email. It saves time by handling repetitive tasks for you, so your team can stay focused on what really matters.
Step 1: Open the Workflow Section #
- On the left sidebar, click Workflow
- You’ll land on the Workflow Automation dashboard, which shows all the workflows you’ve set up.
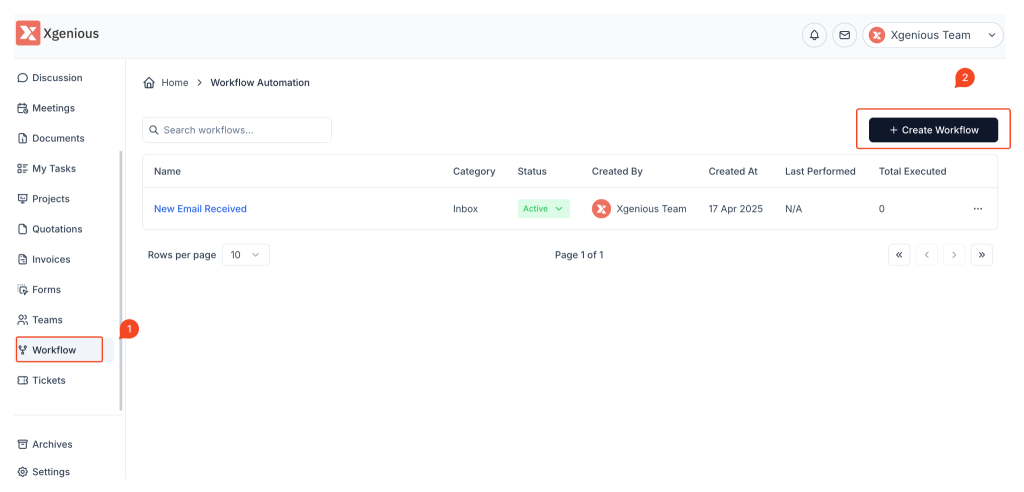
Step 2: Add a New Workflow #
- Click the + Create Workflow button on the top right corner of the page.
- You’ll see a setup screen where you can define:
- When something happens (e.g., a new email arrives)
- What should happen next (e.g., tag the message)
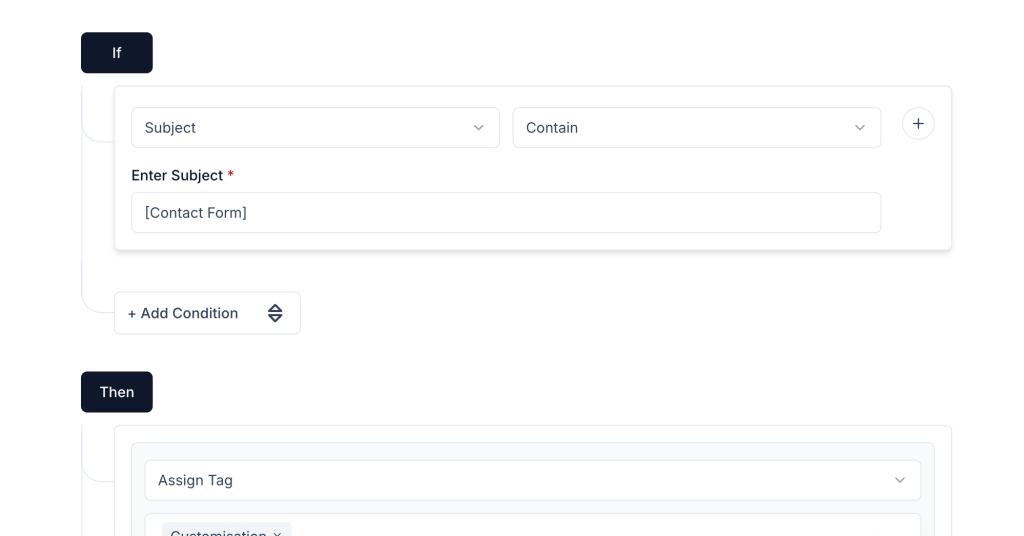
Step 3: Set the Trigger (When Something Happens) #
Under the If section:
- Choose a trigger like Subject, Sender, or Message Content.
- Pick the condition type like Contains, Equals, etc.
- Fill in the value — for example, “
[Contact Form]” if you’re tracking incoming form submissions.
To add more conditions, click + Add Condition.
Example: “If the subject contains [Contact Form]”
Step 4: Choose the Action (What Happens Next) #
Under the Then section:
- Choose what action should be taken when your condition is met.
- For example: Assign Tag and select
Customizationor any other tag you’ve set up.
You can add more than one action, like:
- Tagging
- Assigning to a team member
- Moving to a folder
Example: “Then assign tag Customization”
Step 5: Save and Activate #
- Click Save to store your new workflow.
- Make sure the workflow is set to Active so it starts working right away.
You’ll now see your workflow listed with info like:
- Category (e.g., Inbox)
- Status (Active/Inactive)
- When it was created
- How many times it has run
Example Scenario #
Workflow Name: New Email Received
Condition: Subject contains[Contact Form]
Action: Assign tagCustomization
Why It’s Useful: Instantly organize incoming messages without lifting a finger.


