This automation is ideal when you want to categorize or label incoming messages such as tagging leads, support requests, or internal updates, based on specific conditions like email subject or sender.
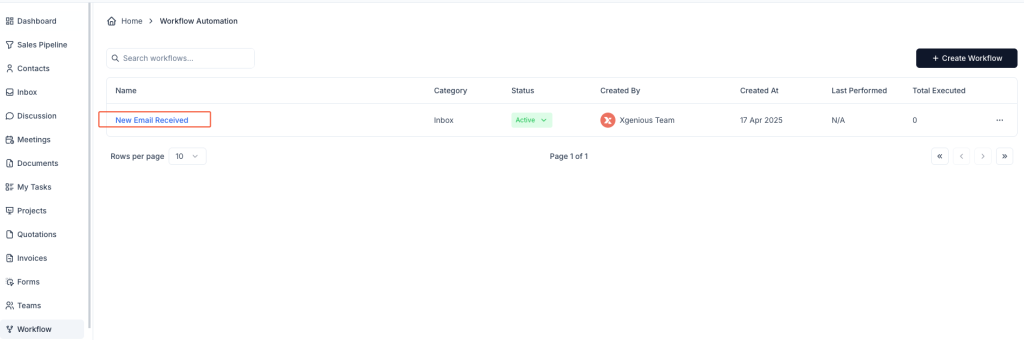
Step 1: Go to Workflow Setup #
- Click on Workflow from the sidebar.
- Click + Create Workflow in the top-right corner.
Step 2: Select Trigger Type #
- Enter a Workflow Name such as
Tag Contact Form Messages. - Under the Inbox tab, choose New Message Received as the trigger.
Step 3: Define the Condition #
- Under the IF section, choose:
- Subject as the condition
- Contain as the match rule
- Enter the keyword or phrase (e.g.,
[Contact Form])
This means: if the subject of an incoming email contains [Contact Form], the workflow will run.
Step 4: Add the “Assign Tag” Action #
- Under the THEN section, choose Assign Tag.
- In the tag selection dropdown, choose from existing tags like:
CustomisationSupportReply Due- Or create and select a new tag such as
Lead Form,Urgent, etc.
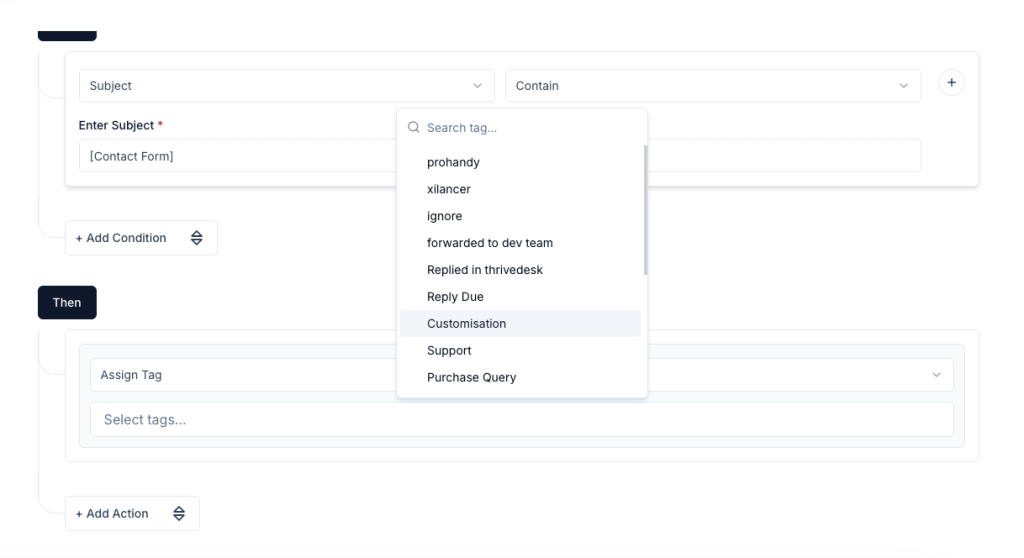
You can add more tags if needed by clicking again in the tag input field.
Step 5: Save the Workflow #
- Click Create Workflow to save it.
- Make sure the workflow is Active so it runs automatically.
Now, whenever a message matches the subject condition you set, it will be tagged accordingly—keeping your inbox organized and your team informed.
Example #
Workflow Name: Tag Contact Form
Condition:
- Subject contains
[Contact Form]
Action: - Assign Tag:
Customisation
This will automatically label all relevant emails, making them easier to find and follow up.


