This type of automation helps you take action when a new email contains a specific subject line or keyword , like “Support Request,” “Invoice,” or “Contact Form.”
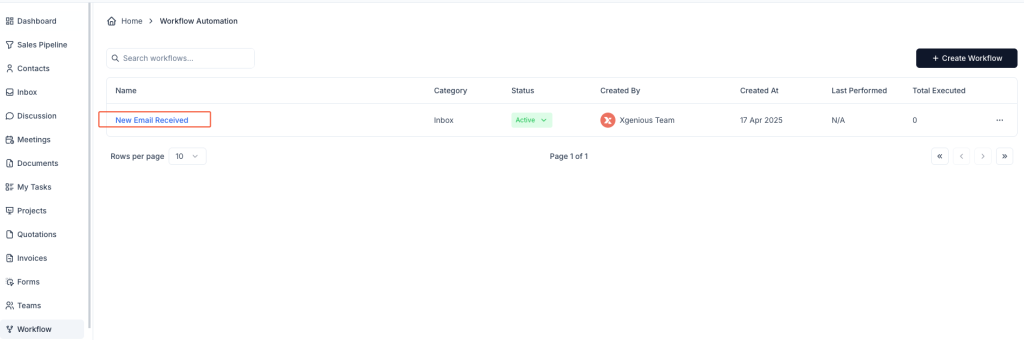
Step 1: Access the Workflow Automation Panel #
- Go to Workflow from the sidebar menu.
- Click the + Create Workflow button in the top-right corner.
Step 2: Set Up the Trigger #
- Enter a meaningful Workflow Name. e.g., “Tag Support Emails” or “Contact Form Handler.”
- Under the Inbox tab, choose New Message Received as the trigger.
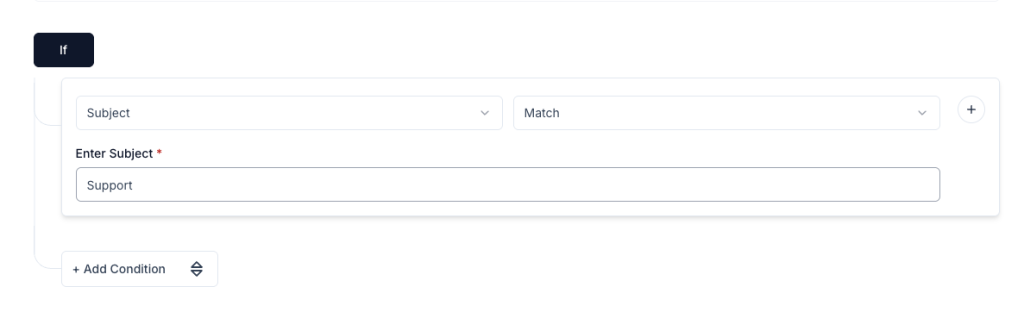
Step 3: Define the Subject Condition #
- Under the IF section:
- Choose
Subjectfrom the dropdown. - Choose a condition type:
Contains– if you’re looking for a word/phrase within the subject.Match– if the subject must exactly match your input.
- Choose
- Enter the subject line or keyword you want to watch for.
Example:[Contact Form],Support,Invoice #
You can add multiple subject-related conditions if needed using + Add Condition.
Step 4: Choose What Should Happen (Then) #
Now it’s time to tell Taskip what to do when the subject condition is met.
Some useful actions:
- Assign Tag – Example: “Contact Form”, “Urgent”
- Move to Folder – Organize messages into inbox sections
- Assign to Team Member – Automatically assign to the right person
- Reply Email – Send an acknowledgment or automated response
- Convert to Contact or Convert to Deal
- Delete Conversation – it will delete the Email
- Trigger Web-hook Call – it will trigger a web-hook call
You can chain multiple actions together using + Add Action.
Step 5: Save and Activate #
- Click Create Workflow to save it.
- The automation will appear in your workflow list and should be marked Active.
Once set, Taskip will watch every incoming email and act immediately when a subject matches your rule.
Example: Automatically Handle Contact Form Submissions #
Workflow Name: Auto-Tag Contact Form Emails
Condition: Subject contains[Contact Form]
Actions:
- Assign tag
Contact Form- Convert to Contact
- Notify Team Member


