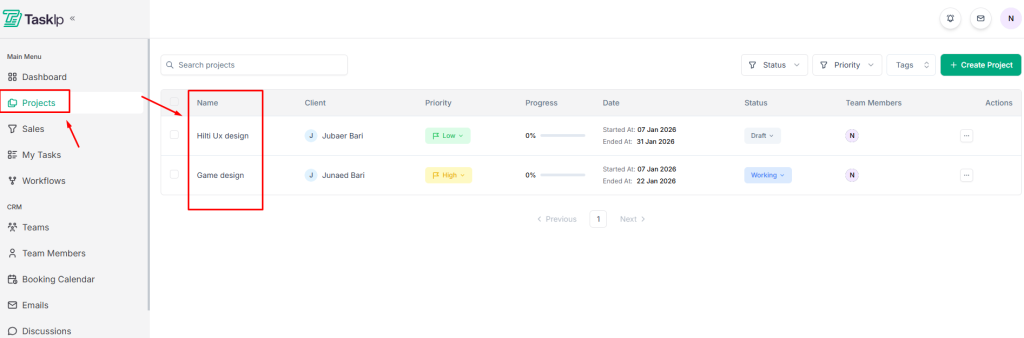
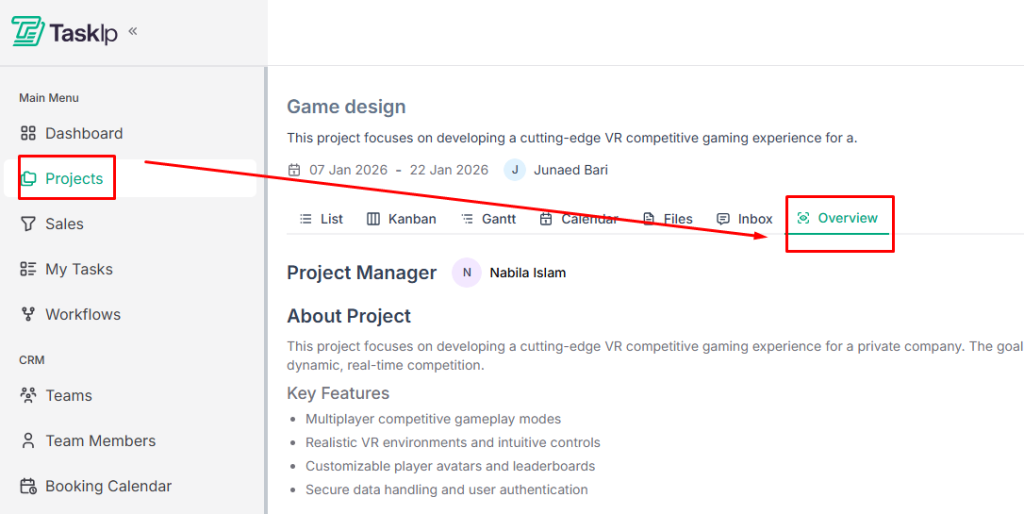
The Projects module is your central hub for organizing, tracking, and managing all client work.
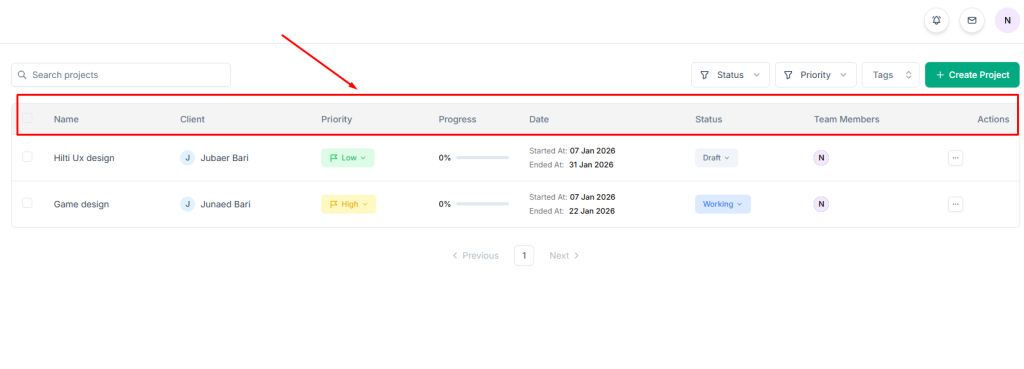
From this dashboard, you can view all projects at a glance, filter by various criteria, and quickly access project details.
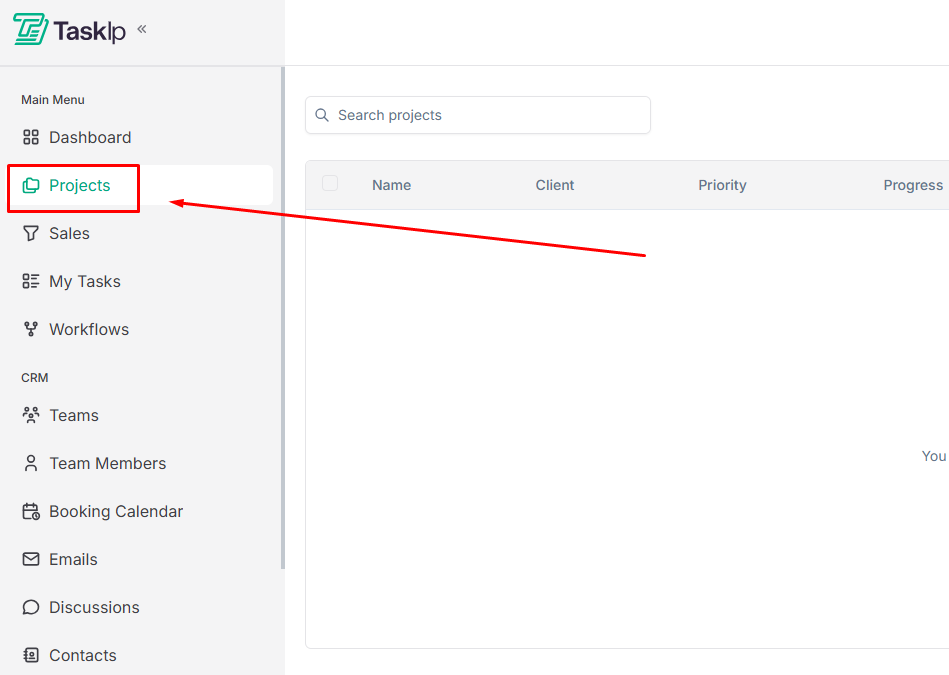
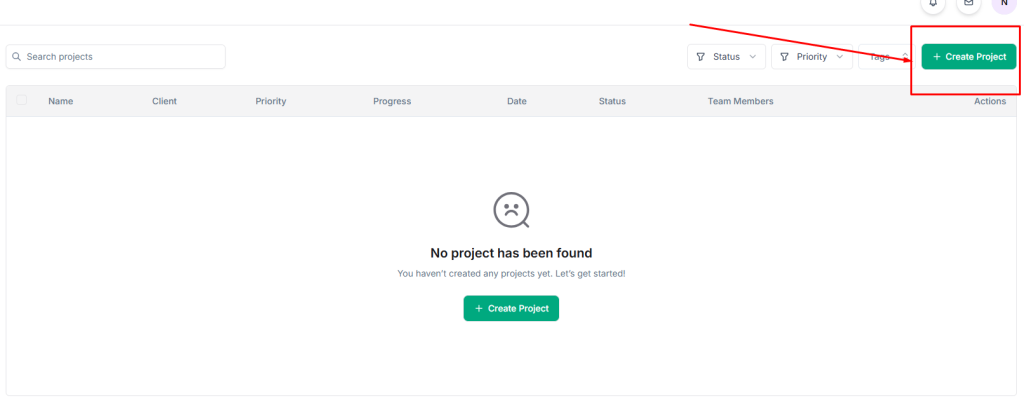
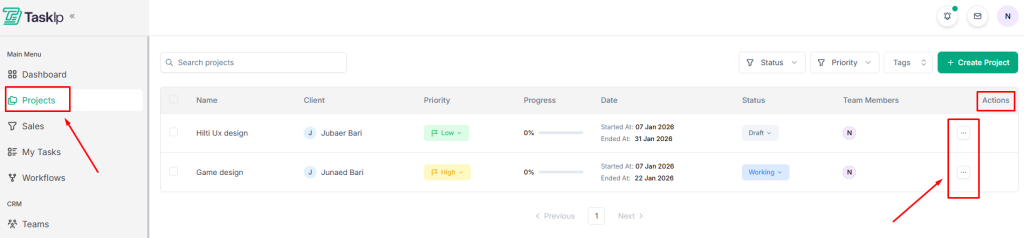
Accessing Projects #
- Click Projects from the main navigation menu.

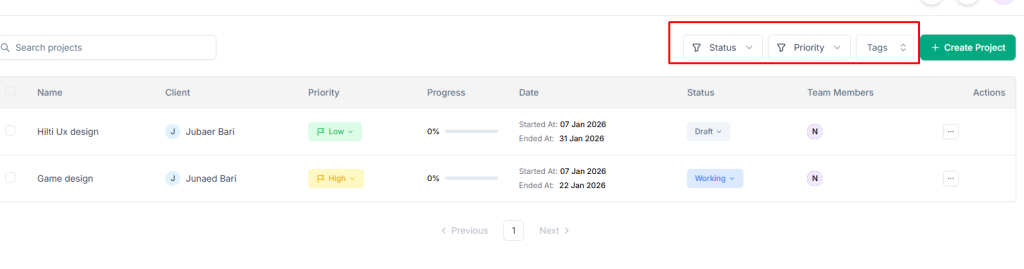
2. View your project list, displaying key information for each project:
- Name: Project title
- Client: Associated client
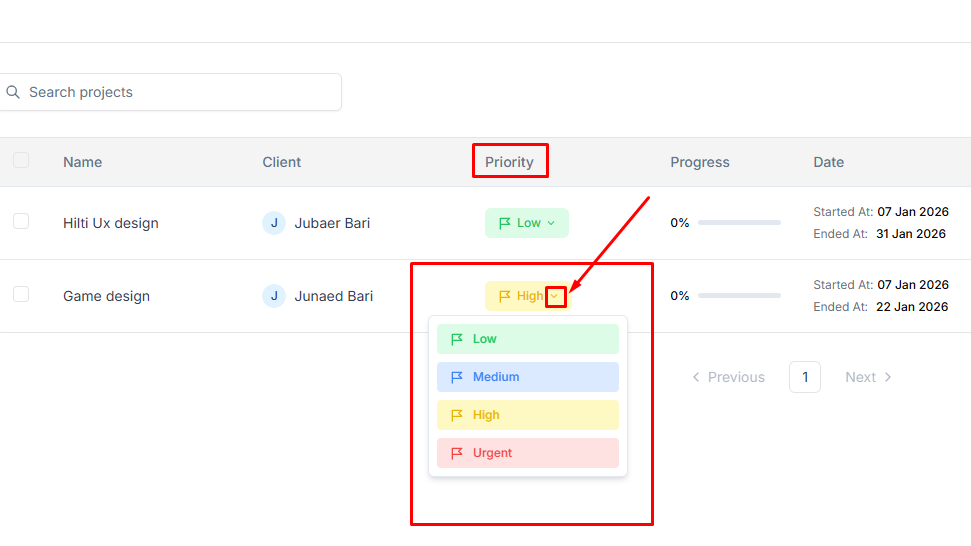
- Priority: Urgency level (Urgent, High, Medium, Low)
- Progress: Completion percentage
- Date: Project timeline
- Status: Current stage (Draft, Working, Review, Completed)
- Team Members: Assigned team
- Actions: Quick action menu
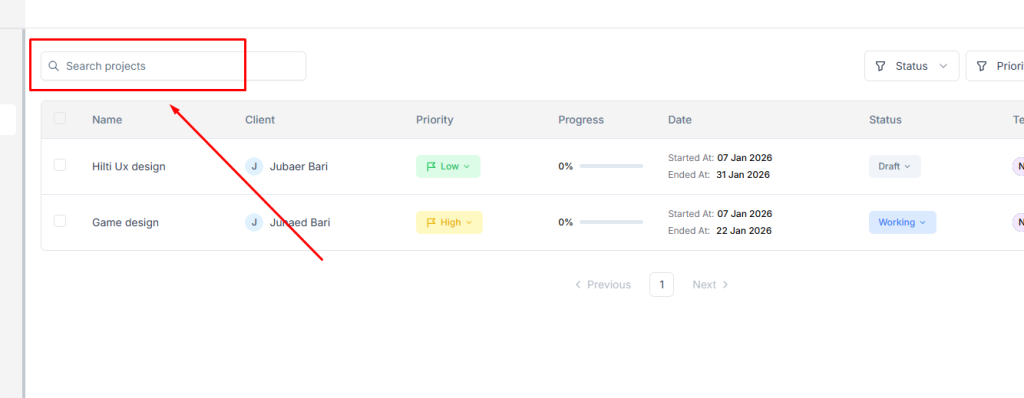
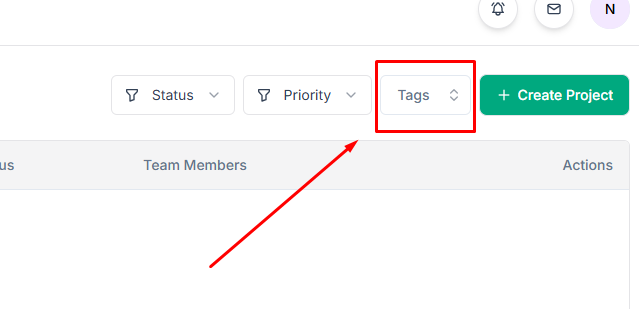
Searching and Filtering Projects #
- Use the Search bar to find projects by name.
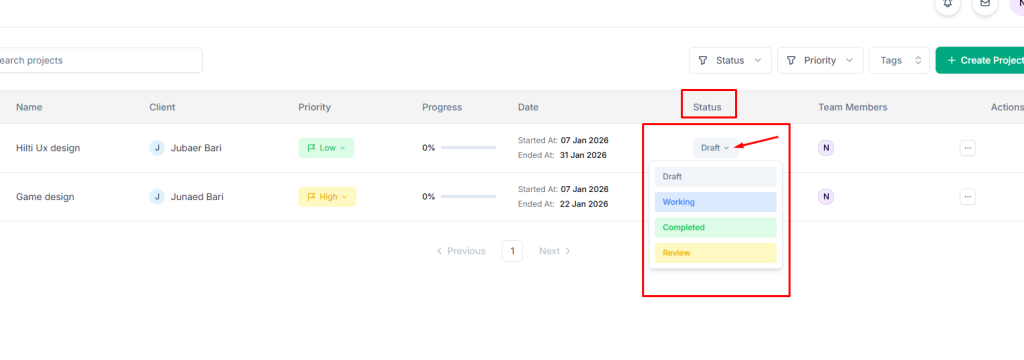
2. Filter projects by Status:
- Draft: Projects in planning phase
- Working: Active projects in progress
- Completed: Finished projects
- Review: Projects awaiting approval
3. Filter by Priority level (Urgent, High, Medium, Low)
4. Filter by Tags for custom categorization
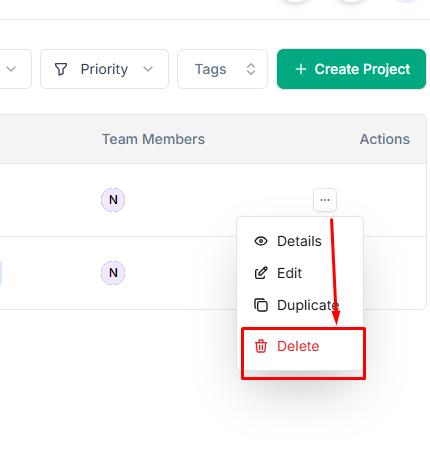
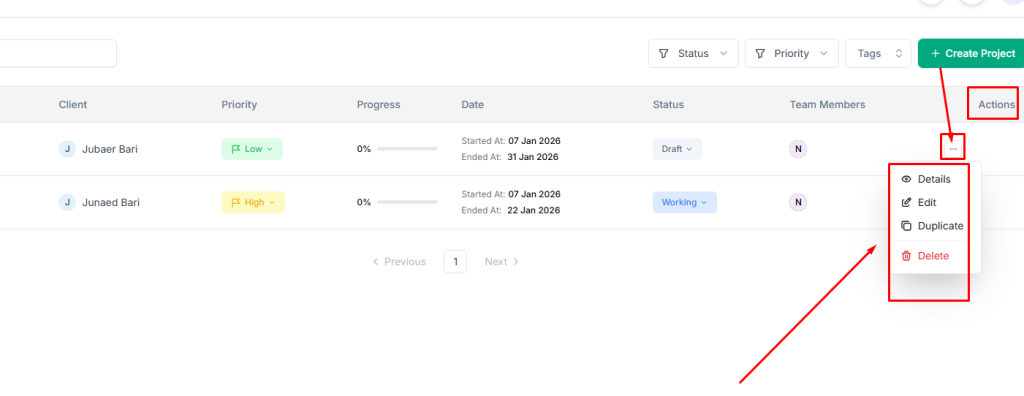
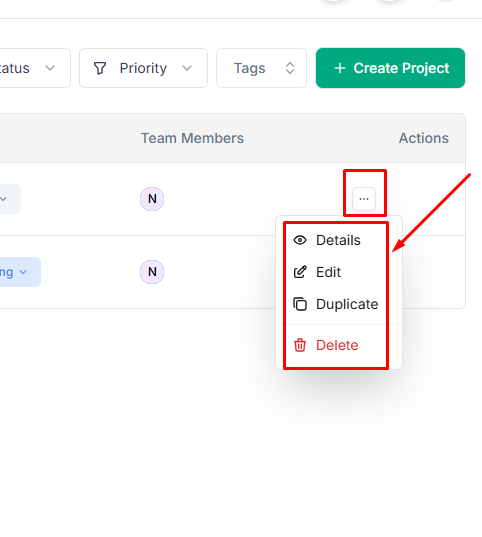
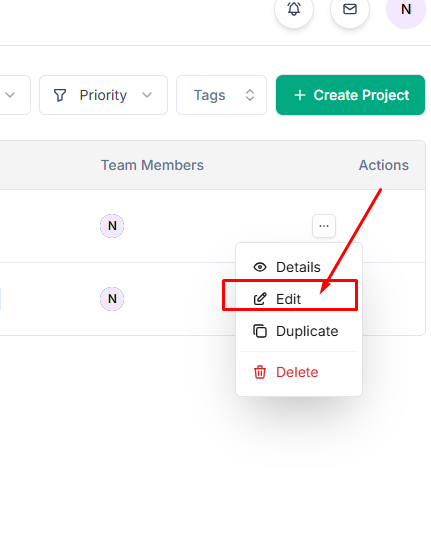
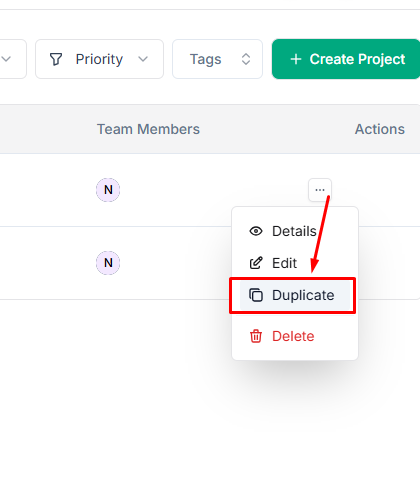
Project Actions #
Click the actions menu (three dots) on any project to:
- Details: View full project information
- Edit: Modify project settings
- Duplicate: Create a copy of the project
- Delete: Permanently remove the project
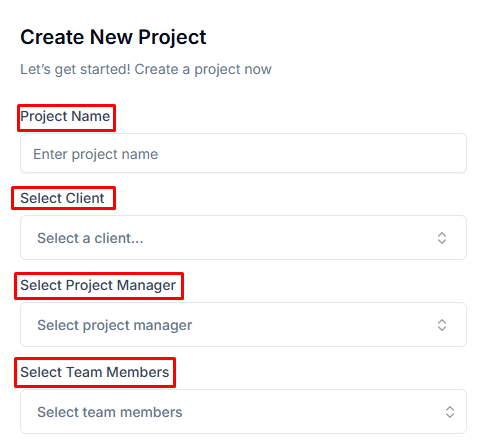
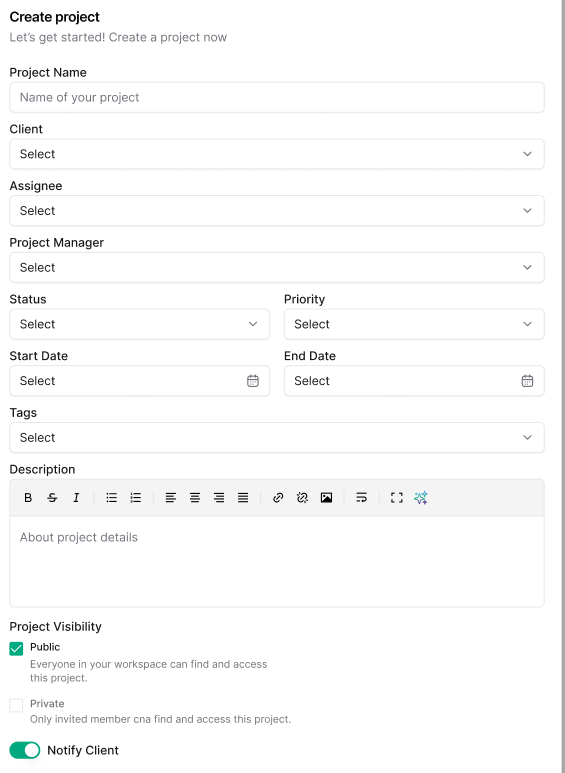
How Do I Create a New Project? #
- Click Projects from the main navigation menu.
- Click Create Project.
- Fill in the project details:
- Project Name: Enter a descriptive title for your project
- Select Client: Choose the client associated with this project from the dropdown
- Select Project Manager: Assign a team member to lead the project
- Select Team Members: Add team members who will work on this project
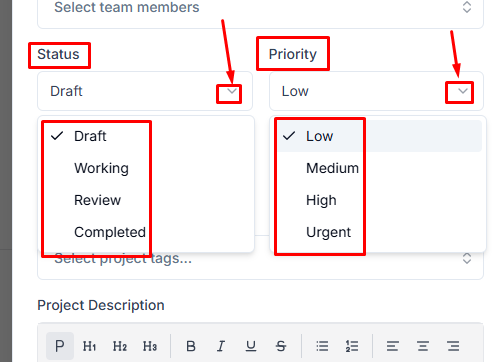
4. Set priority.
Status — Set the initial status using the drop-down menu.
- Draft: Project is being planned
- Working: Project is actively in progress
- Review: Project is awaiting approval
- Completed: Project is finished
Priority — Define urgency level from the drop-down menu.
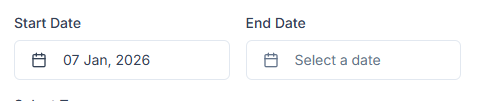
5. Give a timeline.
- Start Date: Select when the project begins
- End Date: Set the project deadline
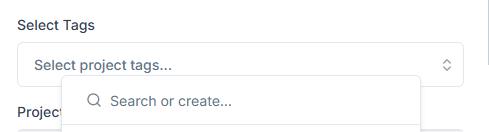
6. Add tags for filtering and categorization
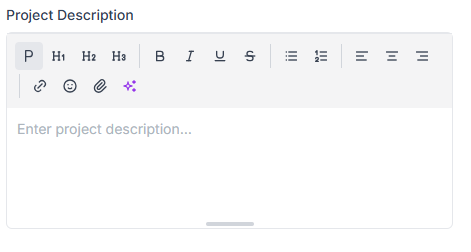
7. Provide details about project scope, objectives, or special instructions
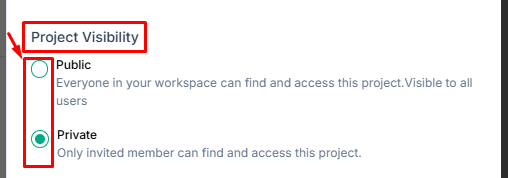
8. Visibility setting
- Public: Everyone in your workspace can find and access this project
- Private: Only invited members can find and access this project
9. Toggle Notify client on project create to automatically inform the client when the project is created.
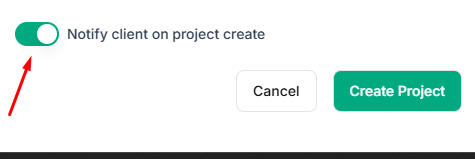
10. Click Create Project to save.
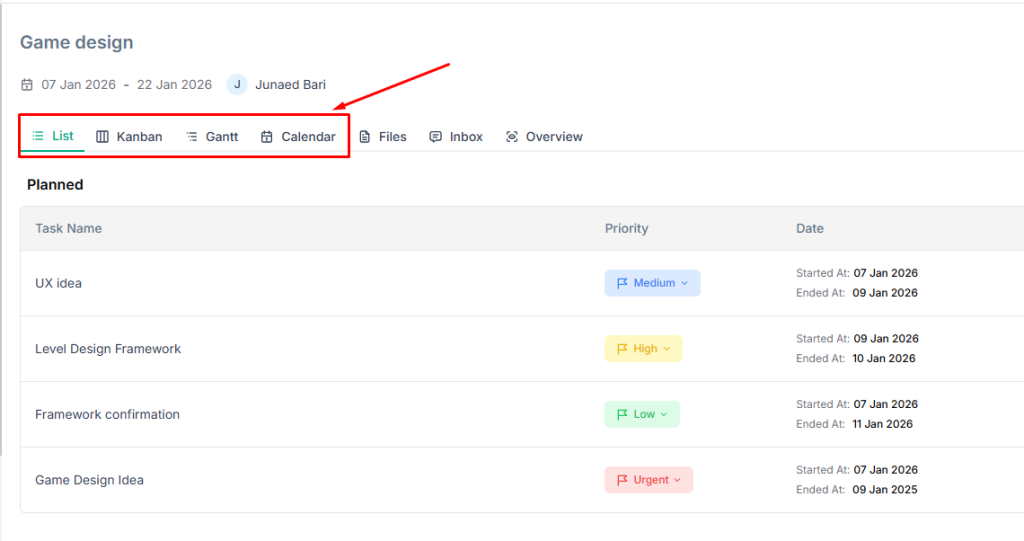
How Do I Switch Between Different Project Views? #
Taskip offers multiple views to visualize your project tasks based on your workflow preference.
Each view presents the same task data in different formats to suit various planning and tracking needs.
Available views include:
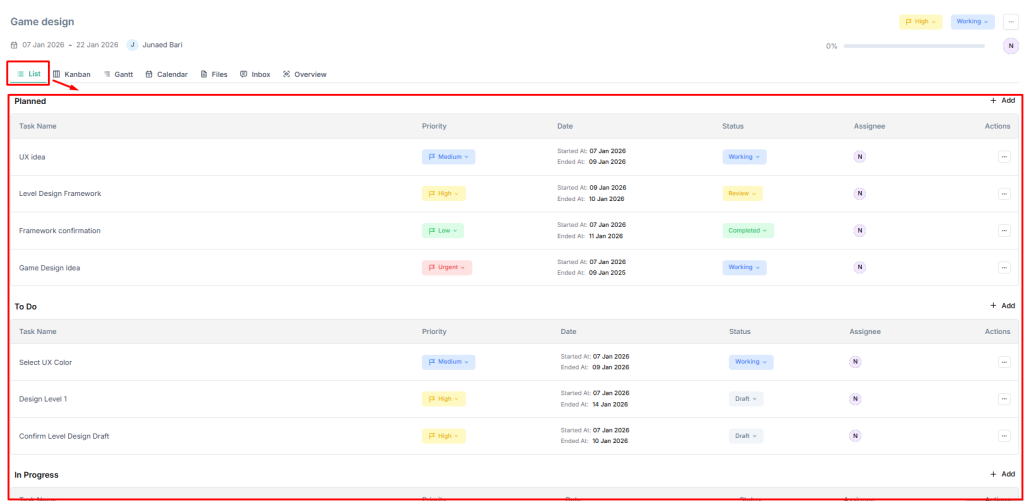
List View #
Best for: Detailed task review and bulk actions
- Click the List tab within your project
- View tasks in a traditional list format
- See task name, assignee, status, priority, and dates in rows
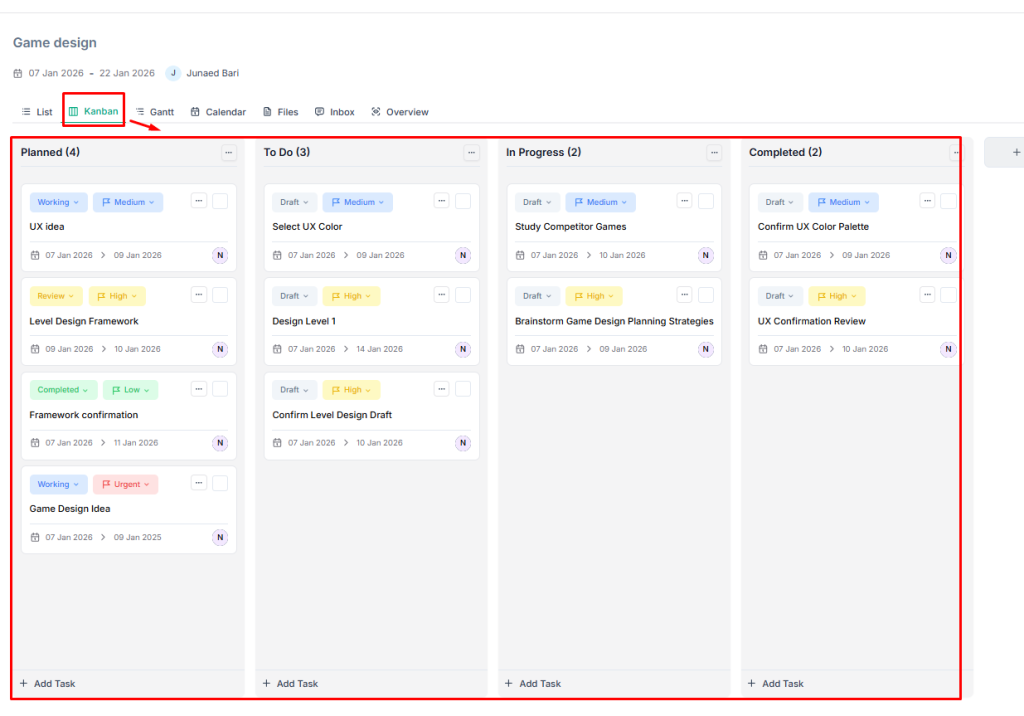
Kanban View #
Best for: Visual workflow management and status tracking
- Click Kanban tab
- View tasks organized in columns by status (Draft, Working, Review, Completed)
- Drag and drop tasks between columns to update status
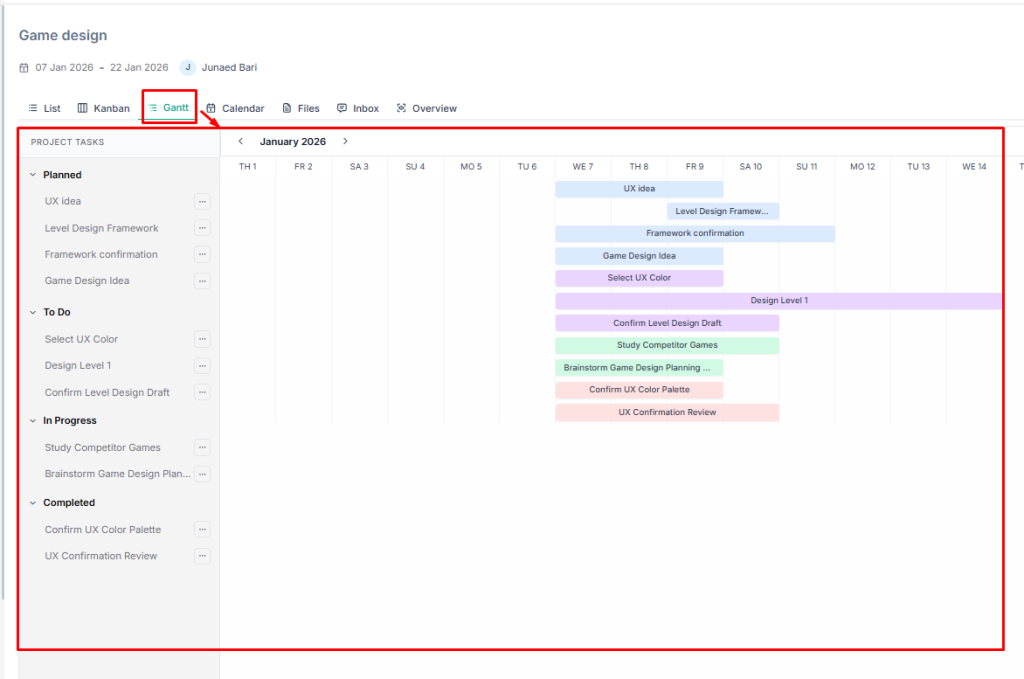
Gantt View #
Best for: Timeline planning and deadline management
- Click Gantt tab
- View tasks on a timeline with start and end dates visualized as bars
- See task dependencies and project schedule at a glance
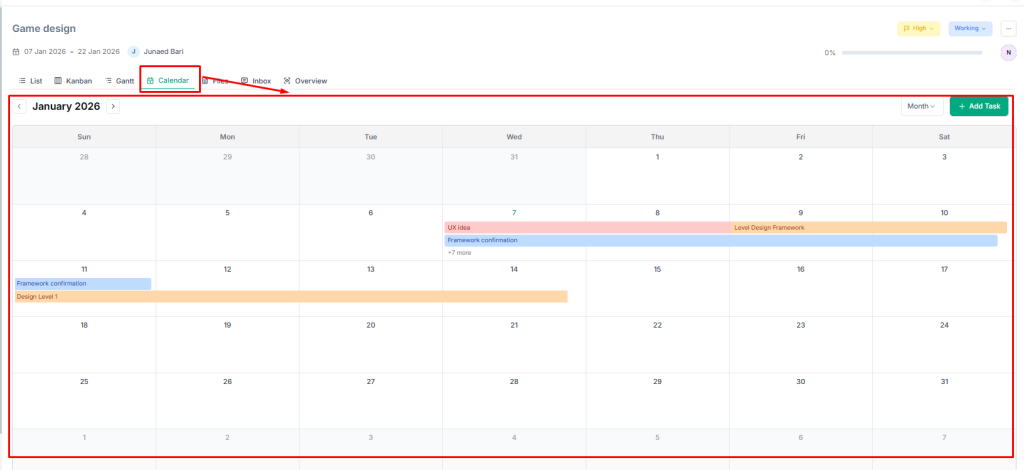
Calendar View #
Best for: Date-based planning and workload distribution
- Click the Calendar tab
- View tasks plotted on a monthly/weekly calendar
- See task deadlines and scheduling conflicts
Switching Views #
- Click the desired view tab at the top of the project detail page
- Your view preference is retained when you return to the project
- All views reflect the same underlying task data: changes made in one view appear in all others
How Do I Create and Manage Tasks Within a Project? #
Tasks are the actionable items that drive project completion.
Taskip provides multiple methods to create tasks, including manual entry, AI assistance, and bulk CSV import.
Creating a Task Manually #
- Go to Project from the main menu and select a project.
2. Click Add and select Create Task for manual process.
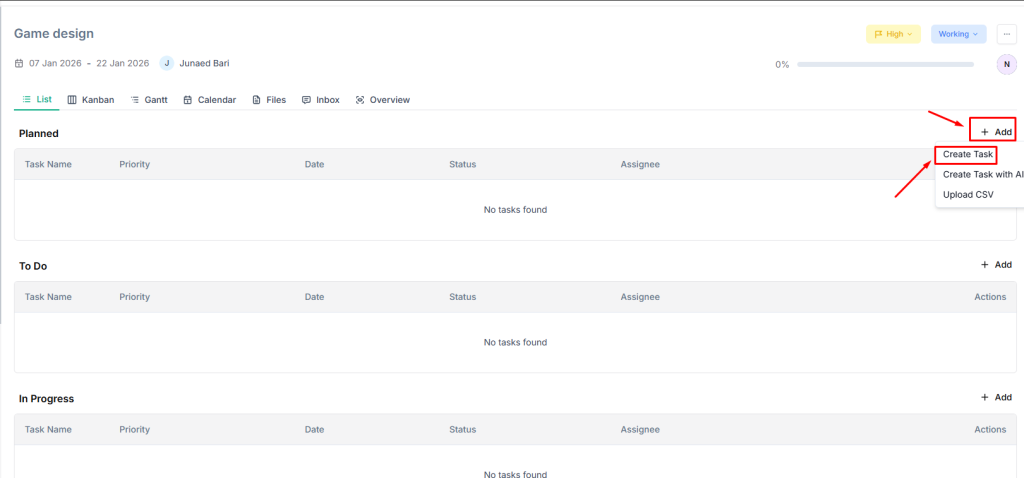
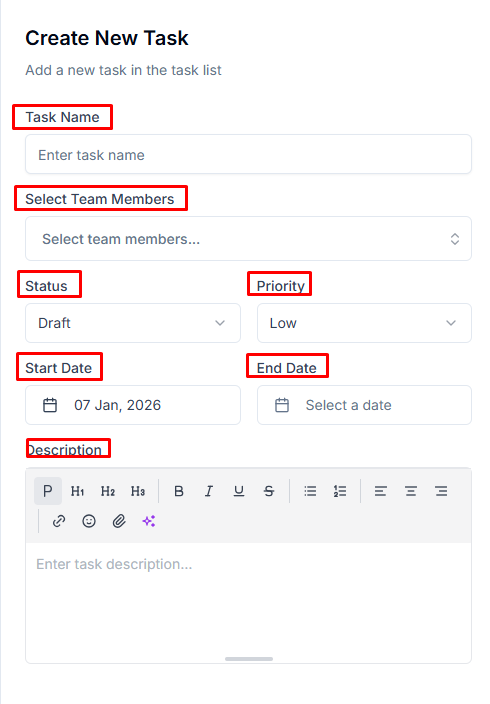
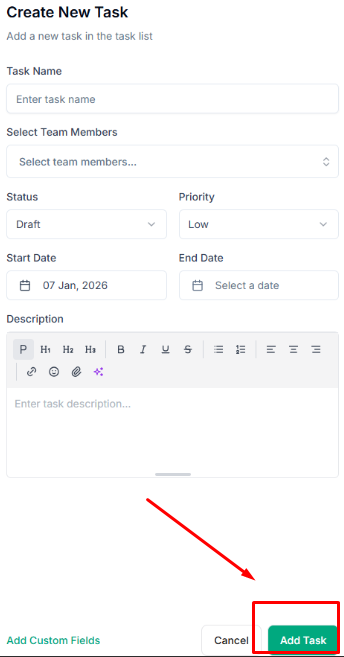
3. Fill in task details:
- Task Name: Clear, actionable title describing the work
- Select Team Members: Assign responsible team members
- Status: Set initial status (Draft, Working, Review, Completed)
- Priority: Define urgency (Low, Medium, High, Urgent)
- Start Date: When work should begin
- End Date: Task deadline
- Description: Detailed instructions or context
4. Click Add Custom Fields to include additional data fields if configured.

Include the necessary information (Field Name, Select Field Type, Field Value) to create a custom field and click Add Fields.
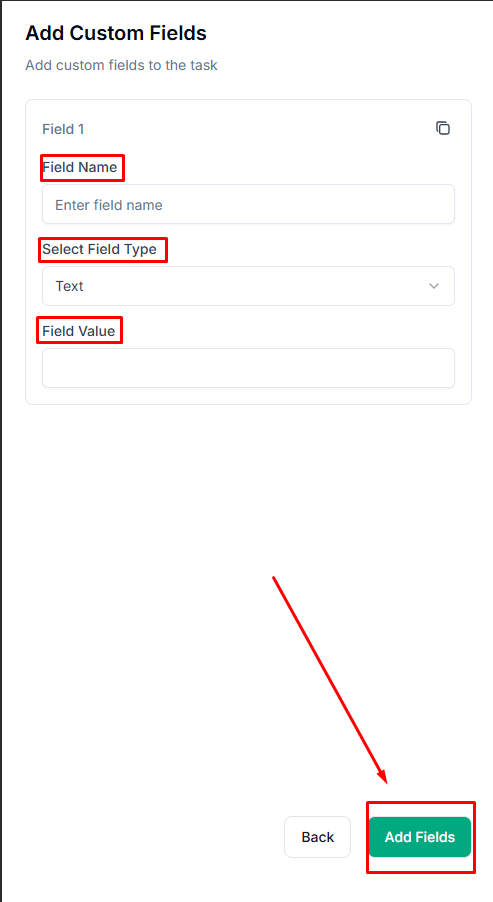
5. Click Add Task to save.
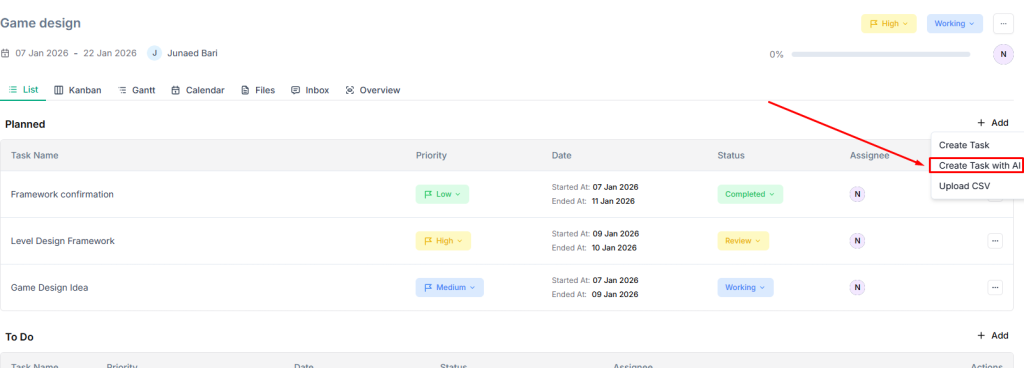
Creating Tasks with AI #
- Click Add and select Create Task with AI
2. Describe your task in natural language
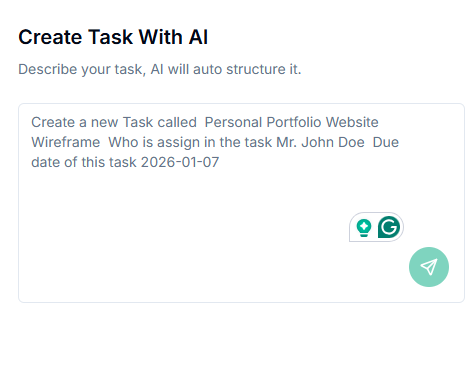
3. AI will automatically structure the task with appropriate fields
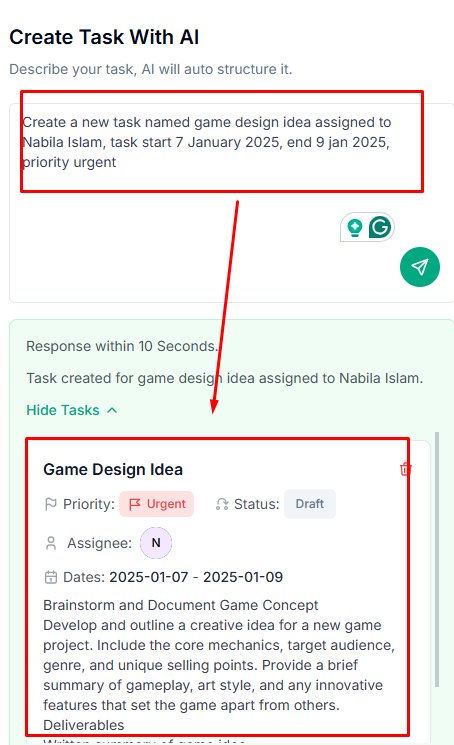
4. Review and adjust the generated task details

5. Save the task
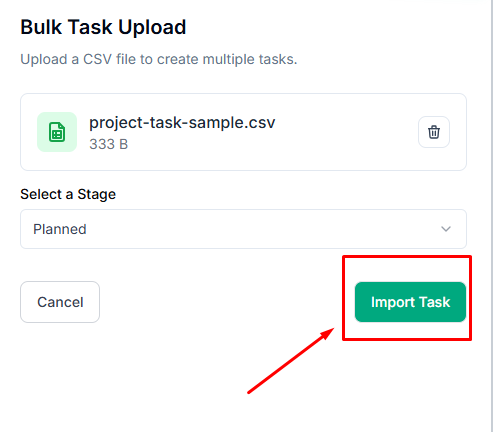
Bulk Importing Tasks via CSV #
- Click Add and select Upload CSV
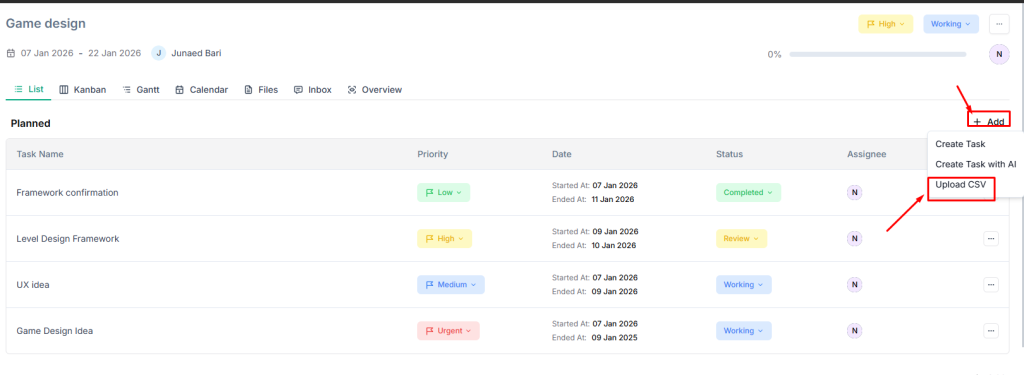
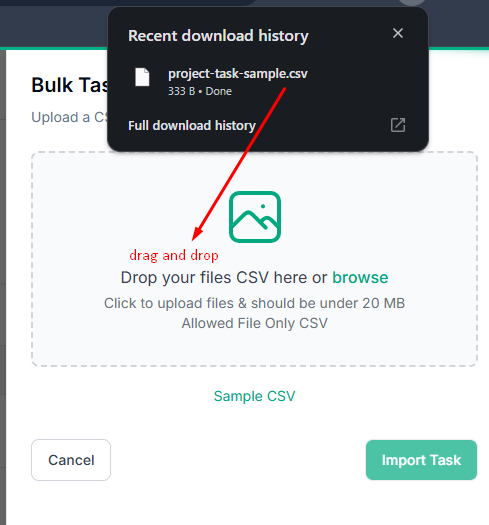
2. Download the Sample CSV to see the required format
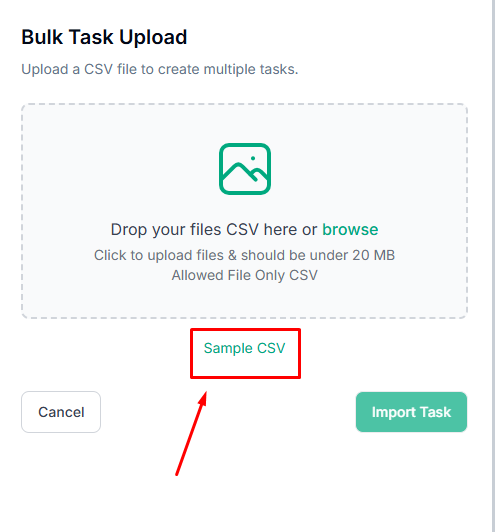
3. Prepare your CSV file with task data
4. Drag and drop your CSV file or click to browse
- File must be under 20 MB
- Only CSV format is accepted
5. Select a Stage from the dropdown menu.

6. Click Import Task to create all tasks from the file.
Managing Existing Tasks #
- Click on any task to view or edit details
- Drag tasks between columns in Kanban view to update status
- Use filters to find specific tasks by status, priority, or assignee
- Delete or duplicate tasks from the task actions menu
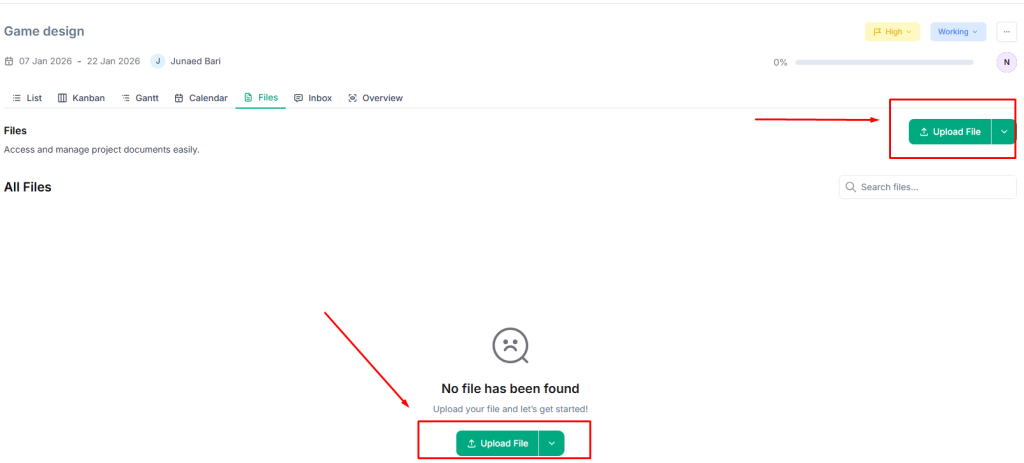
How Do I Upload and Manage Project Files? #
The Files section provides centralized document storage for each project. Keep all relevant files organized and accessible to team members working on the project.
Assessing Project Files
- Open your project
- Click the Files tab
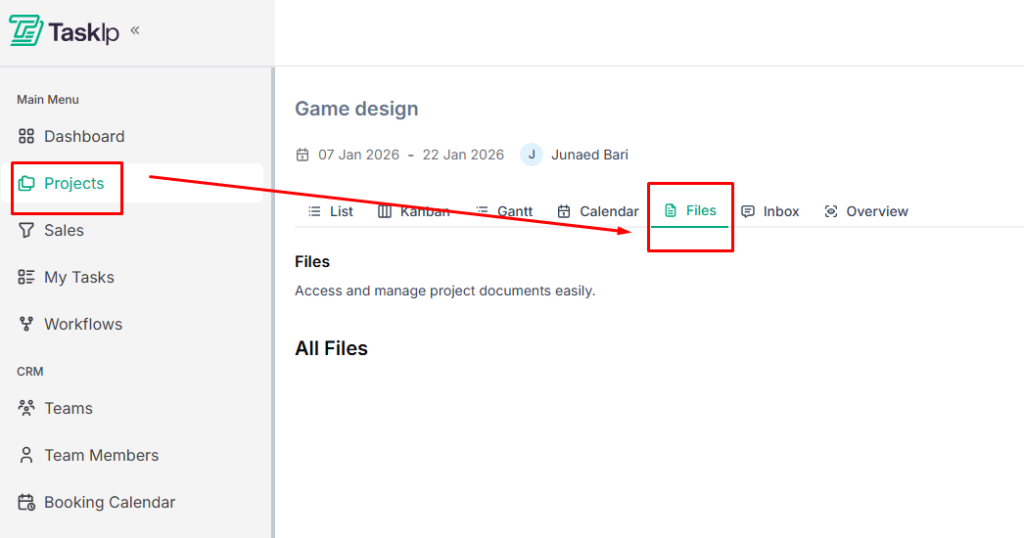
3. View all uploaded files associated with the project
Manual file Uploading #
- Click the Upload File button
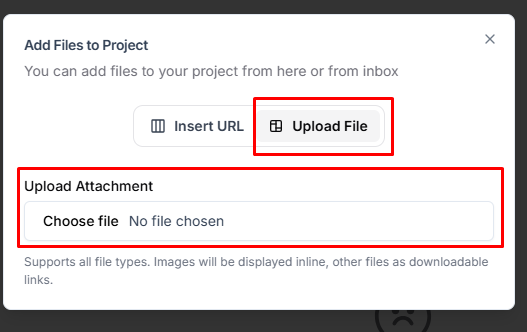
2. Choose your upload method:
Direct File Upload:
- Click Upload File tab
- Drag and drop files into the upload area, or click to browse
- Files must be under the size limit specified
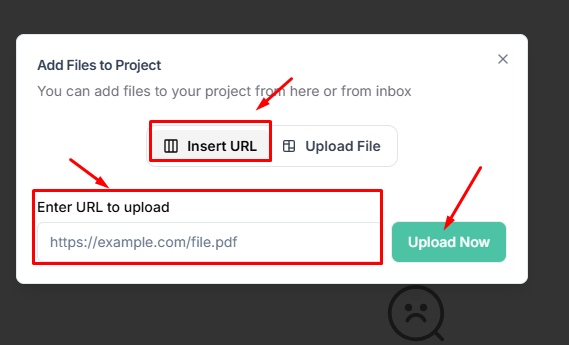
URL Upload:
- Click Insert URL tab
- Enter the file URL in the provided field
- Click Upload Now to import the file
Google Drive Integration #
- Click the dropdown menu of Upload File and select Google Drive.
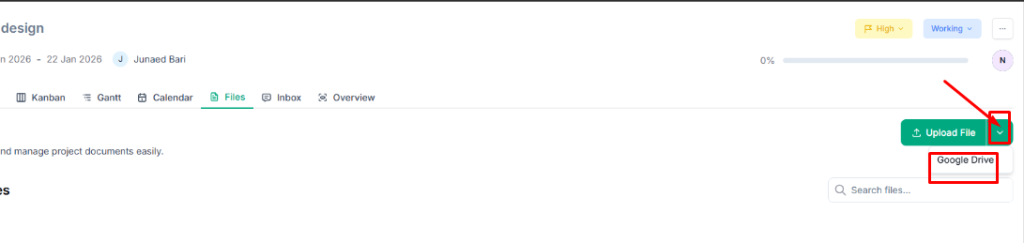
- Connect your Google Drive account if it’s not already linked
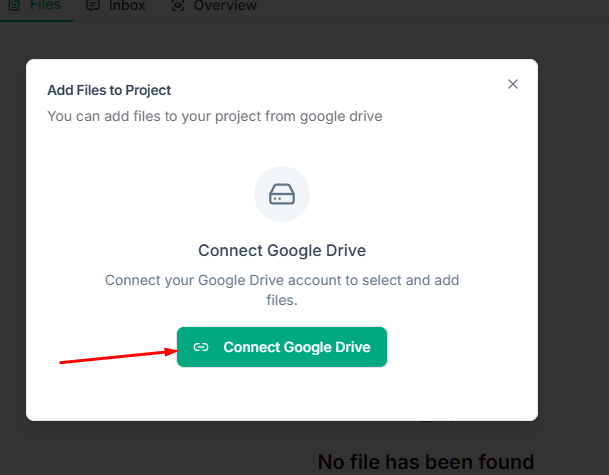
- Browse and select files from your Google Drive
- Selected files become accessible within the project
Managing Files #
- View all uploaded files in the All Files section
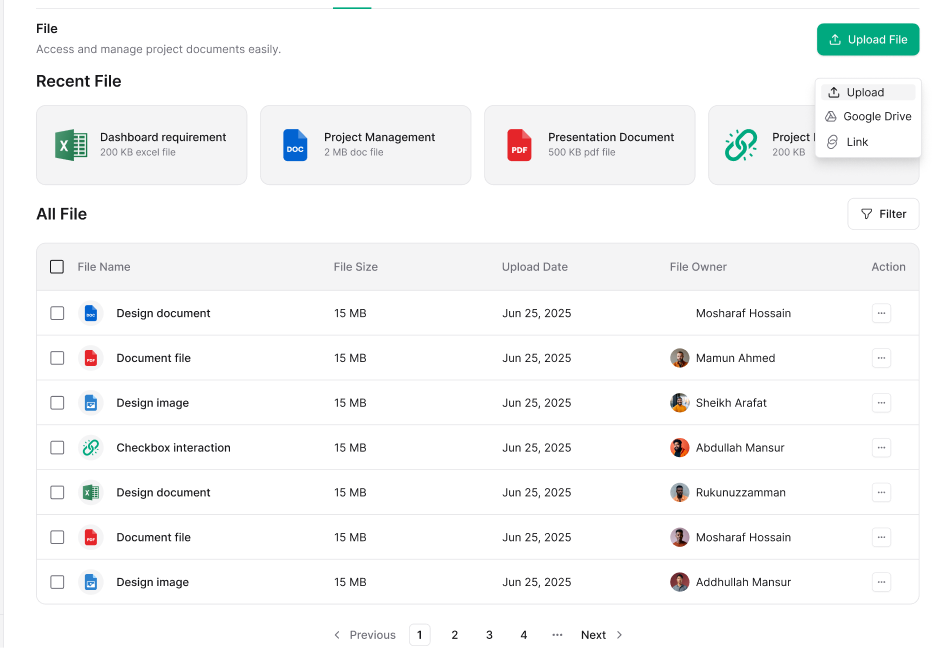
- Click on a file to preview or download
- Delete files no longer needed for the project
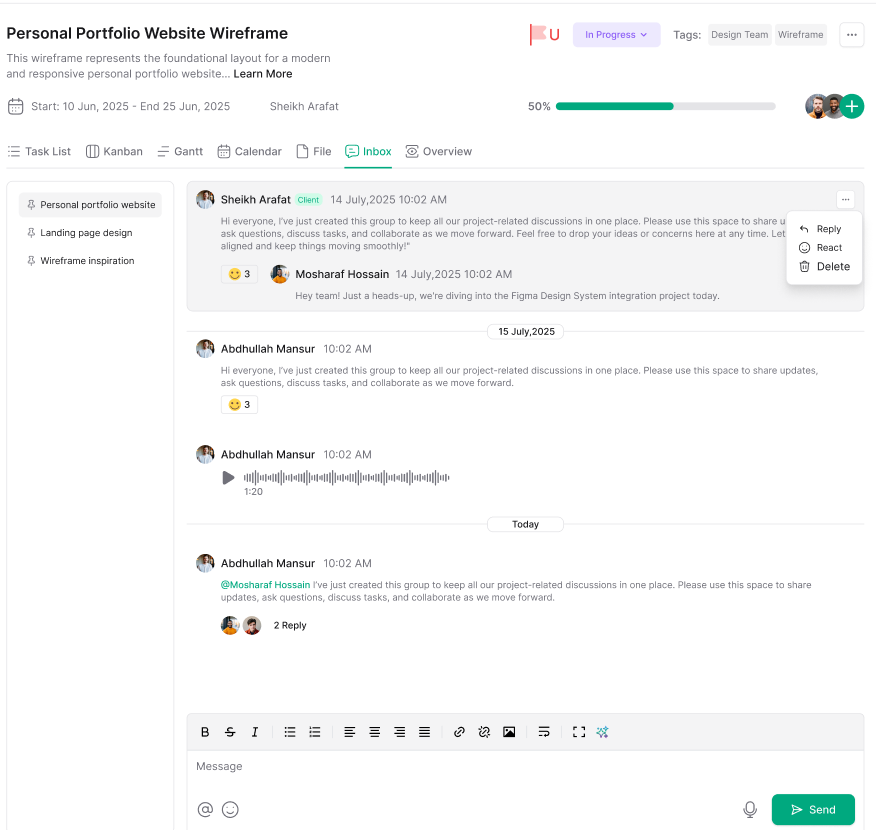
How Do I Use the Project Inbox For Communication? #
Each project has a dedicated Inbox for managing project-related email communications. This keeps all correspondence organized within the context of the specific project.
Assessing Project Inbox
- Open your project
- Click the Inbox tab

3. View all email threads associated with this project
Using Project Inbox
- View incoming messages related to the project
- Reply to emails directly from within Taskip
- Besides text, you can use a link, an emoji, send a voice message, or upload a file.
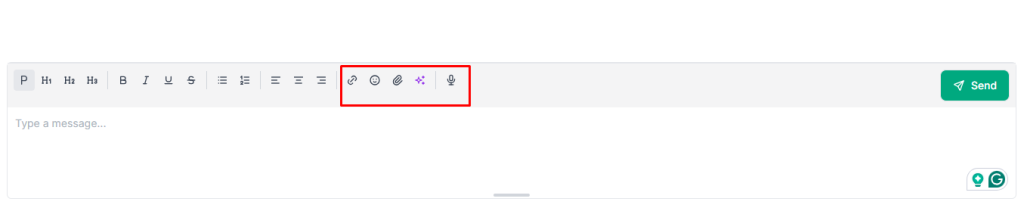
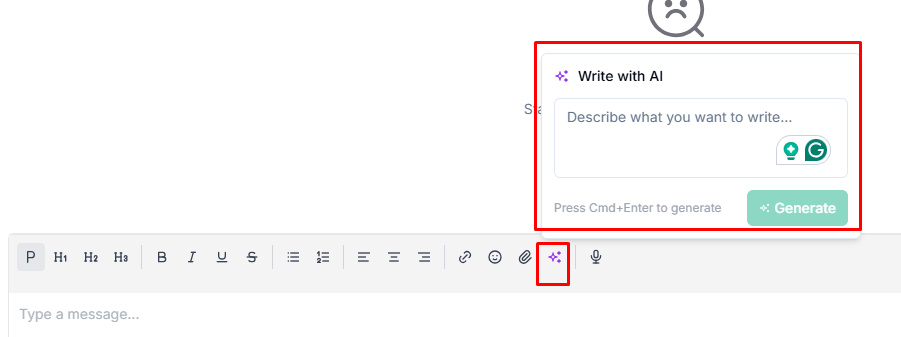
- Generate text with AI
- Keep project communication separate from your main workspace inbox
- Reference past conversations without searching through general email
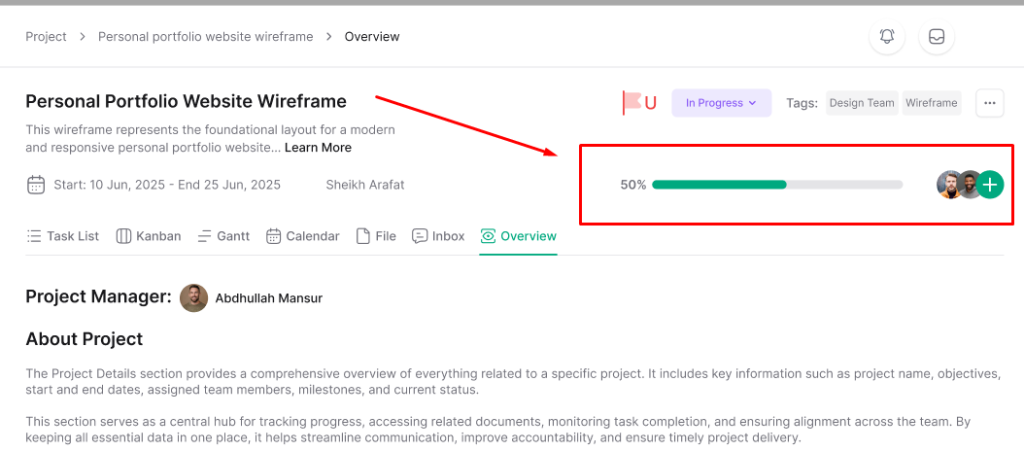
How Do I Track Project Progress and Team Performance? #
The Overview tab provides a snapshot of project health, task distribution, and team productivity. Use this dashboard to quickly assess project status and identify bottlenecks.
Accessing Project Overview
- Open your project
- Click the Overview tab
About Project Section
View task distribution across stages:
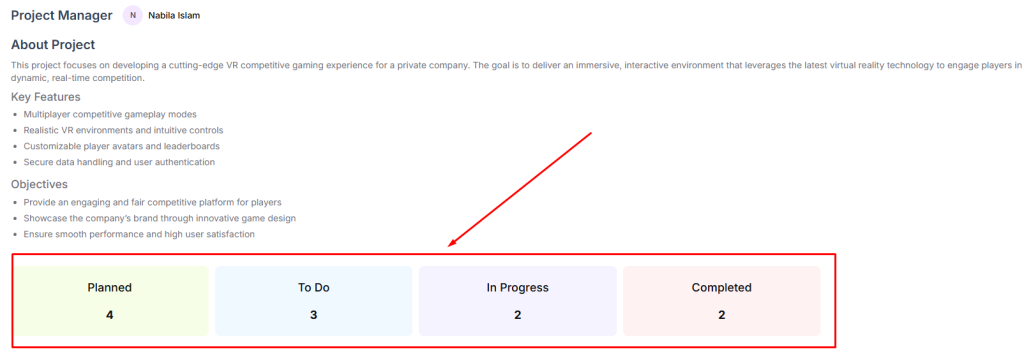
- Planned: Tasks scheduled but not started
- To Do: Tasks ready to begin
- In Progress: Tasks currently being worked on
- Completed: Finished tasks
Progress Tracking #
- View overall project completion percentage
- See how tasks are distributed across statuses
- Identify stages with task backlogs
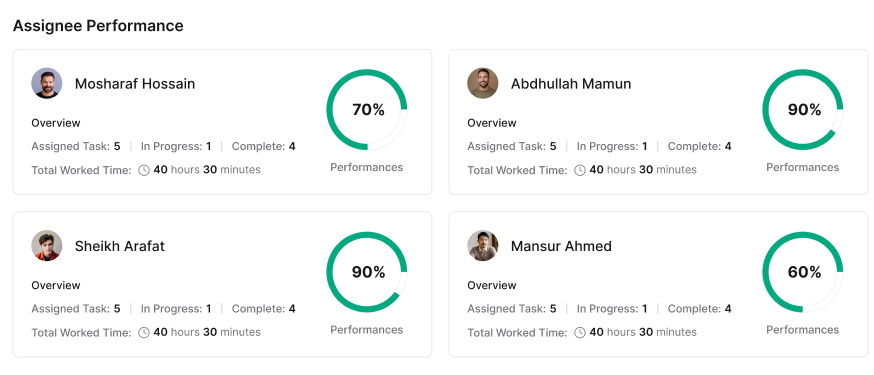
Assignee Performance #
- View individual team member productivity
- See task completion rates per assignee
- Identify workload distribution across the team
How Do I Edit Project Details and Settings? #
After creating a project, you can modify any settings, including team assignments, timeline, visibility, and status as the project evolves.
Editing a Project
- Navigate to your project list
- Click the Actions menu (three dots) on the project
3. Select Edit
4. Modify any project fields:
- Update project name or description
- Change client association
- Reassign the project manager or team members
- Adjust status or priority
- Modify start and end dates
- Update tags
- Change visibility settings (Public/Private)
5. Click Save Changes
Duplicating a Project #
- Click the Actions menu on the project
- Select Duplicate
3. A copy of the project is created with all settings
4. Edit the duplicated project as needed
Deleting a Project #
- Click the Actions menu on the project
- Select Delete
- Confirm the deletion when prompted