Configuring Razorpay as a payment gateway in Taskip allows you to easily manage payments and transactions. Follow these steps to integrate Razorpay with Taskip:
Step 1: Navigate to Payment Methods in Settings #
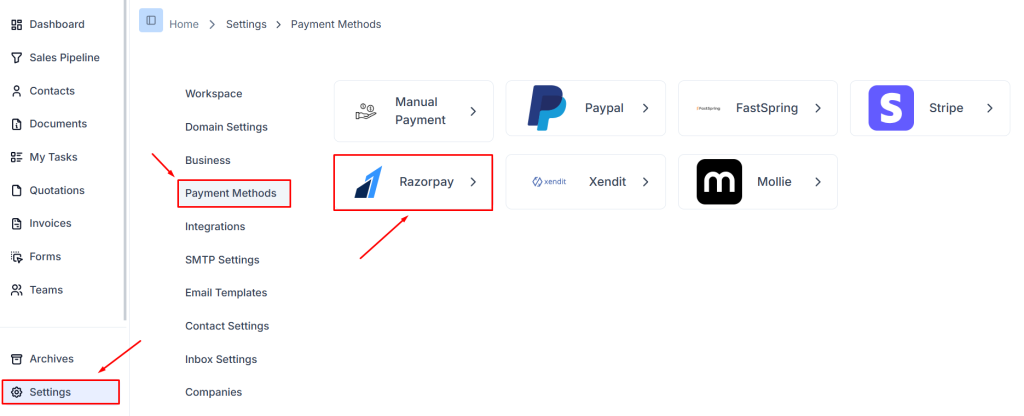
- Login to Taskip and go to the Settings menu from the sidebar.
- Click on Payment Methods from the settings options to access the available payment gateways.
- On the Payment Methods page, you will see several available options like Stripe, Razorpay, Paypal, Xendit, and more.
- Select the Razorpay option to begin the configuration process.
Step 2: Access Razorpay Settings #
After selecting Razorpay, you’ll be directed to a settings page where you can customize the Razorpay payment method.
You will see several configuration options like Is Default, Test Mode, Secret Key, Publishable key, Webhook Secret, and Webhook URL.
Step 3: Enter the Key ID and Key Secret #
- In the Secret Key and Publishable key fields, enter the credentials from your Razorpay dashboard.
- You can generate these credentials by logging into your Razorpay account and navigating to Settings → API Keys.
- Click Generate Key if you do not already have one.
- Copy the Secret Key and Publishable key , then paste them into the corresponding fields in Taskip.
Step 4: Configure Webhook URL #
- The Webhook URL is used to notify Taskip about transaction statuses from Razorpay.
- To add the webhook in your Razorpay dashboard, log in to your Razorpay account, navigate to Settings → Webhooks → Add New Webhook, paste the Webhook URL and Webhook Secret from Taskip.
- Ensure that the webhook URL and Webhook Secret are correctly set up to communicate with Taskip for real-time transaction updates.
Step 5: Enable Test Mode (Optional) #
Toggle the Test Mode option on to test your integration without processing real payments.
This mode is helpful for troubleshooting before going live.
Step 6: Set as Default Payment Method (Optional) #
To make Razorpay the default payment gateway for your Taskip account, enable the Is Default toggle.
This will make Razorpay the primary method for processing payments.
Step 7: Save Changes #
After filling out the required information and verifying all settings, click Save Changes to apply the configuration.
Step 8: Verify Integration #
- Test the configuration by making a transaction using the Razorpay gateway in Test Mode.
- Ensure that payments are processed correctly and that the webhook is functioning by monitoring updates on the Taskip dashboard.
Conclusion #
By following these steps, you can integrate and configure Razorpay in your Taskip workspace. With Razorpay as your payment gateway, you can provide smooth and secure payment options to your users while leveraging Taskip’s robust task management features.
For more details on configuring Razorpay Webhooks or API setup, refer to the official Razorpay Documentation.


